Before you begin
To organize a Hub, you must have co-owner or editor permissions. For details, see Box Hubs Permissions.Edit your Hub
To open a Hub in edit mode:- Go to the Hubs gallery.
- Select the Hub you want to edit.
- In the upper-right corner, select Edit.
Logo and header alignment
You can center-align the logo in the Hub builder. When you center-align the logo, the hub name and description are also center-aligned.Content blocks
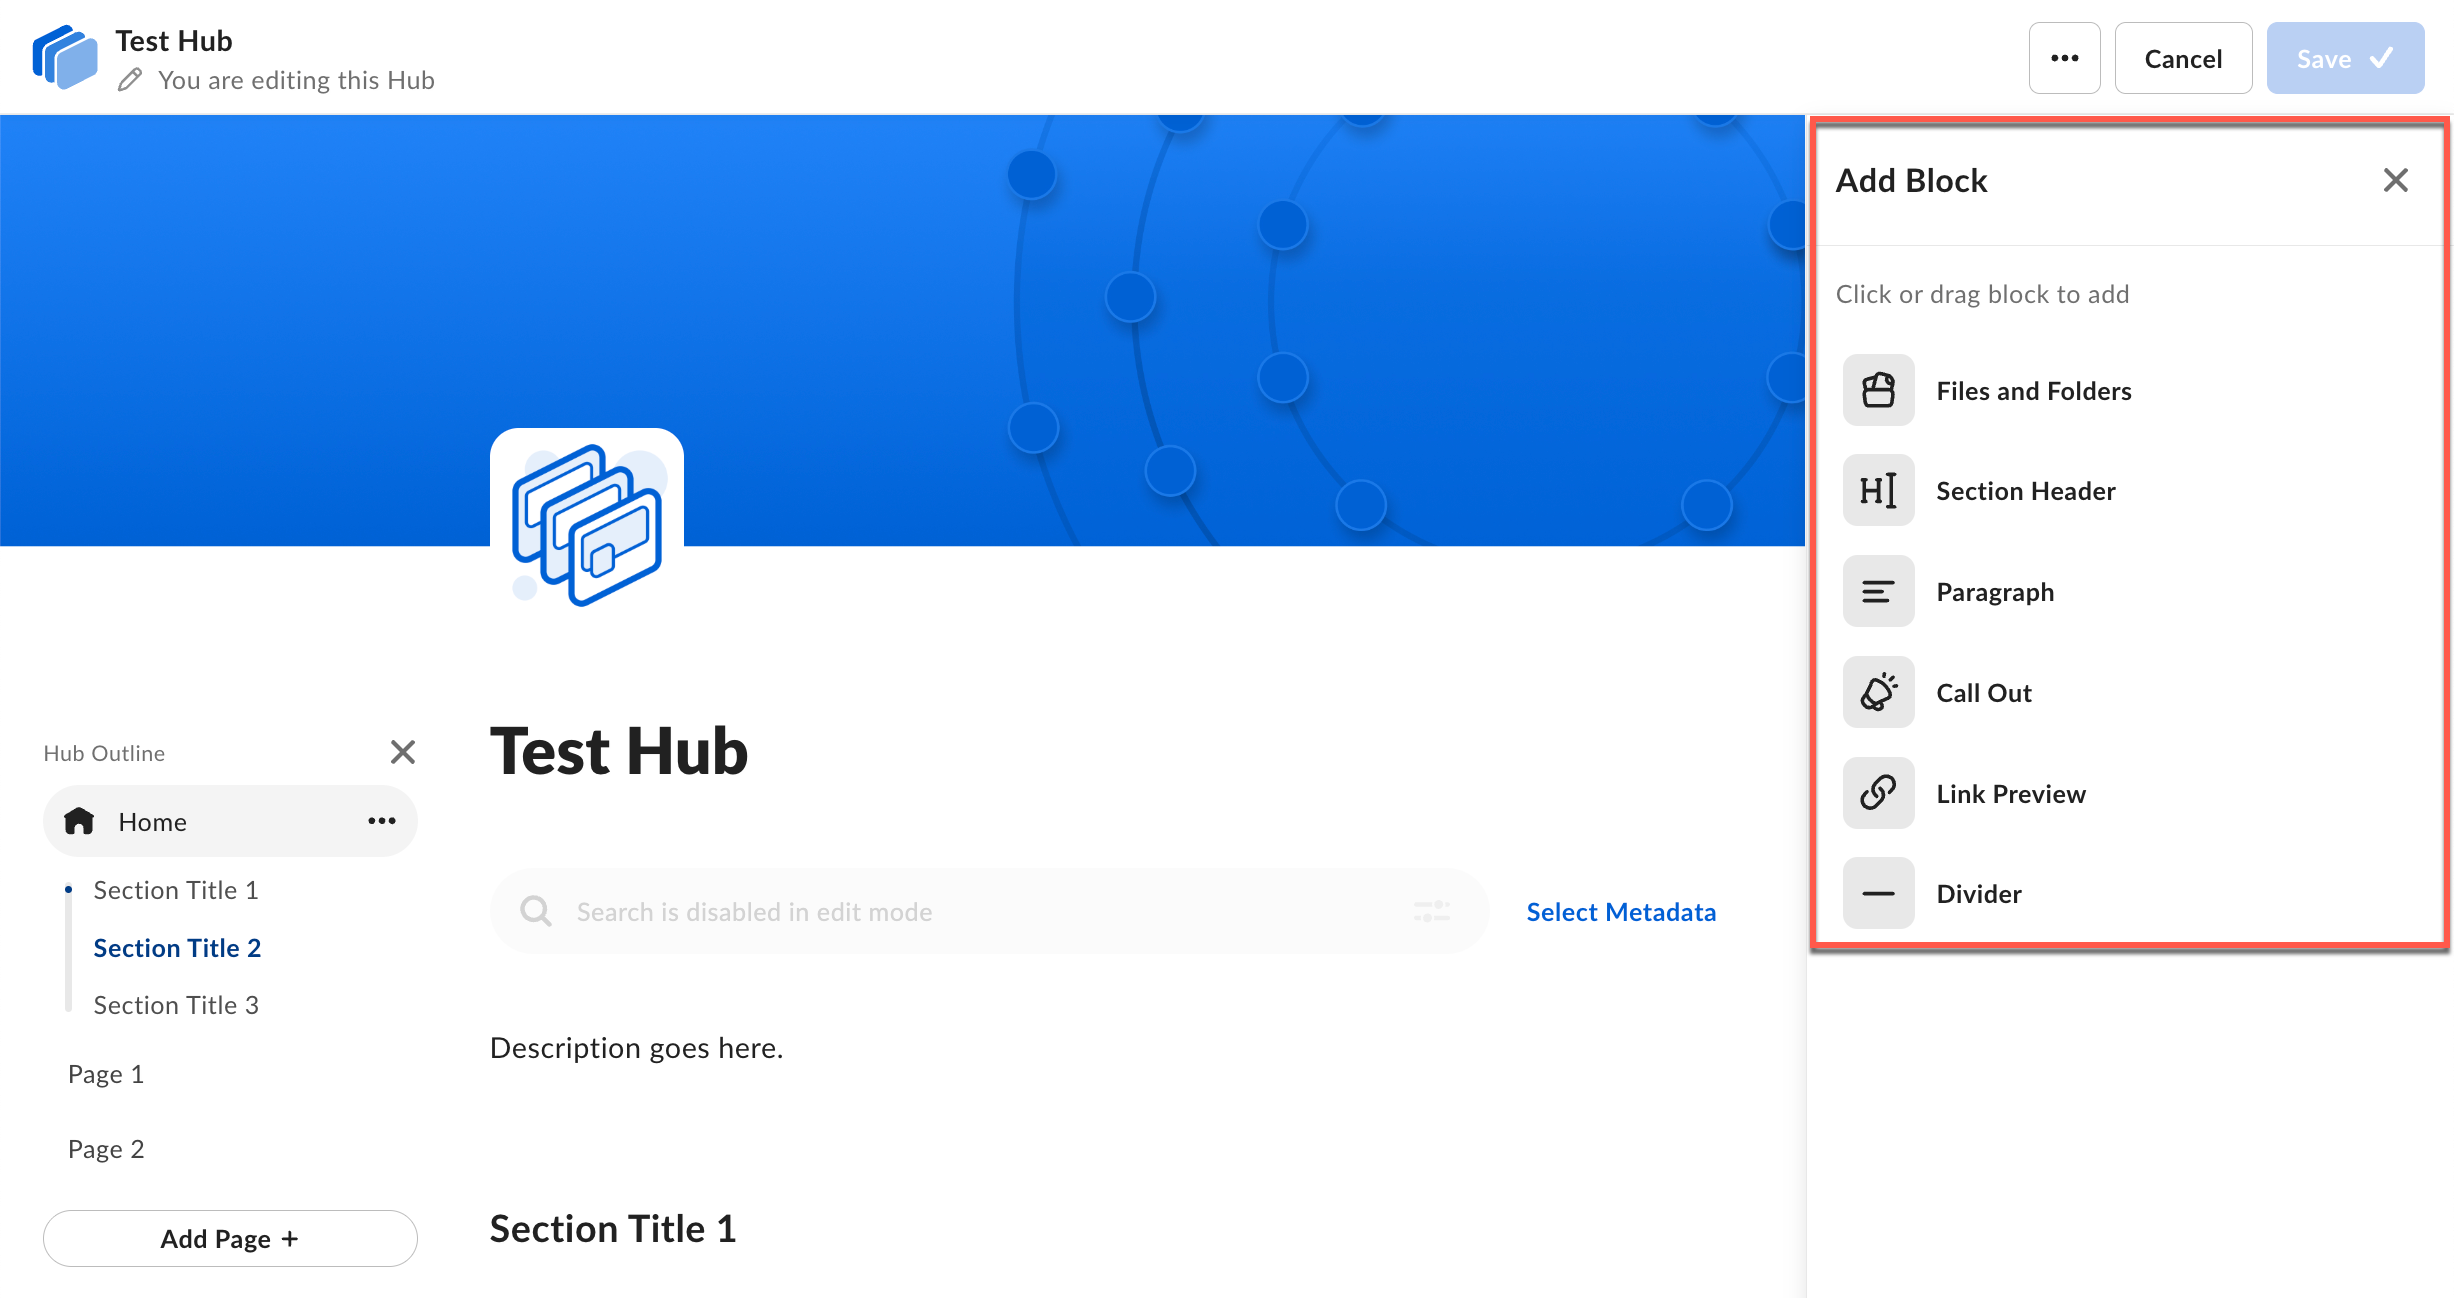
Content blocks are the building blocks of your Hub. Each block type serves a different purpose:Add a block
Use either method to add a block: Method 1: Click to add- In the Add Block panel, select the block type.
- The block appears at the end of the page.
- In the Add Block panel, drag the block type onto the page.
- Drop it in the desired location.
Manage blocks
To manage a block:- Select the block on the canvas.
- The context toolbar appears with available options:
- Move up or down
- Move to a Different Page
- Duplicate
- Trash
- Add Items (for Files and Folders blocks)
- Display as grid or list (for Files and Folders blocks)
- Formatting toolbar (for Paragraph and Call Out blocks)
In Files and Folders blocks, individual files become draggable only after you select the block. This prevents accidental movement.
- List view: Drag and drop files or folders to reorder them.
- Grid view: Select a file or folder, click the … (three dots) at the bottom of the card, and click the Move Left or Move Right arrow.
Delete a block
- Select the block.
- On the context toolbar, select Trash.
Link Cards
The Link Cards block displays a row of customizable cards that link to Hub pages, Box content, or external URLs. When you add the block, three empty cards appear by default. To configure a card, select it, add a link, and edit the title, description, or background image. When you add a link, the card pulls the title, description, and image from the destination if those details are available. Cards that link outside your enterprise show an external link icon and open in a new tab. To manage cards within the block:- Select Add Card to add a card.
- Select Trash on the card toolbar to remove a card.
- Use the arrows on the card toolbar to reorder cards.
- A Link Cards block must contain at least one card. When you remove the last card, the entire block is deleted from the page.
- If you save the Hub with a card that has no link added, that card isn’t shown when viewers open the Hub.
Sections
Sections help you organize related content by creating visual separators on your page. Each section title marks the beginning of a new section.Create a section
- In the Add Block panel, select Section Title or drag it onto the page.
- Enter a section title (up to 100 characters).
- Add content blocks to your section.
Reorder sections
- Select the section title.
- In the context toolbar, select Move Up or Move Down.
- Move the section to the desired position.
Rename a section
- Select the section title.
- Enter the new title.
Delete a section
- Select the section.
- In the context toolbar, select Trash.
Pages
Pages provide another level of organization in your Hub. You can create multiple pages and nest them to build a clear hierarchy.Add a page
- In the Hub Outline panel, select Add Page (+).
- Replace the default title with your page name.
Add a nested page
Nested pages (subpages) appear under a parent page in the hierarchy.- In the Hub Outline panel, hover over the parent page.
- Select the ellipsis (…) to open the page options.
- Select Add Nested Page.
- Enter a title for the nested page.
Duplicate a page
- In the Hub Outline panel, hover over the page.
- Select the ellipsis (…) to open the page options.
- Select Duplicate Page.
Change page hierarchy
You can reorganize your pages at any time:- Reorder pages: Drag a page up or down to change its position.
- Create nested pages: Drag a page onto another page to make it a subpage.
- Promote nested pages: Drag a subpage into the main page area to make it a top-level page.
Your home page is always the highest page in the hierarchy and can’t be moved.
Delete a page
- In the Hub Outline panel, hover over the page.
- Select the ellipsis (…) to open the page options.
- Select Delete Page.
- In the confirmation dialog, select Delete.
Notify collaborators of changes
After you make changes to your Hub, you can notify all collaborators through email.Send a change notification
- Make your changes to the Hub.
- In the upper-right corner, select Save > Save & Notify Collaborators.
- In the notification dialog, enter a message describing your changes.
- Select Save & Notify.
Save without notifying
If you don’t want to notify collaborators:- Make your changes to the Hub.
- In the upper-right corner, select Save.