If you automate a workflow around files or documents – such as moving a budget proposal through an approval process, or a marketing document through multiple collaborators – you reduce the “busy work” of using email, spreadsheets, and messaging apps to monitor the progress of your projects. However, it can be difficult or confusing to imagine exactly how to transform a series of manual business actions into an automated workflow – or even to figure out whether you need a workflow at all.
That’s where workflow templates come in.
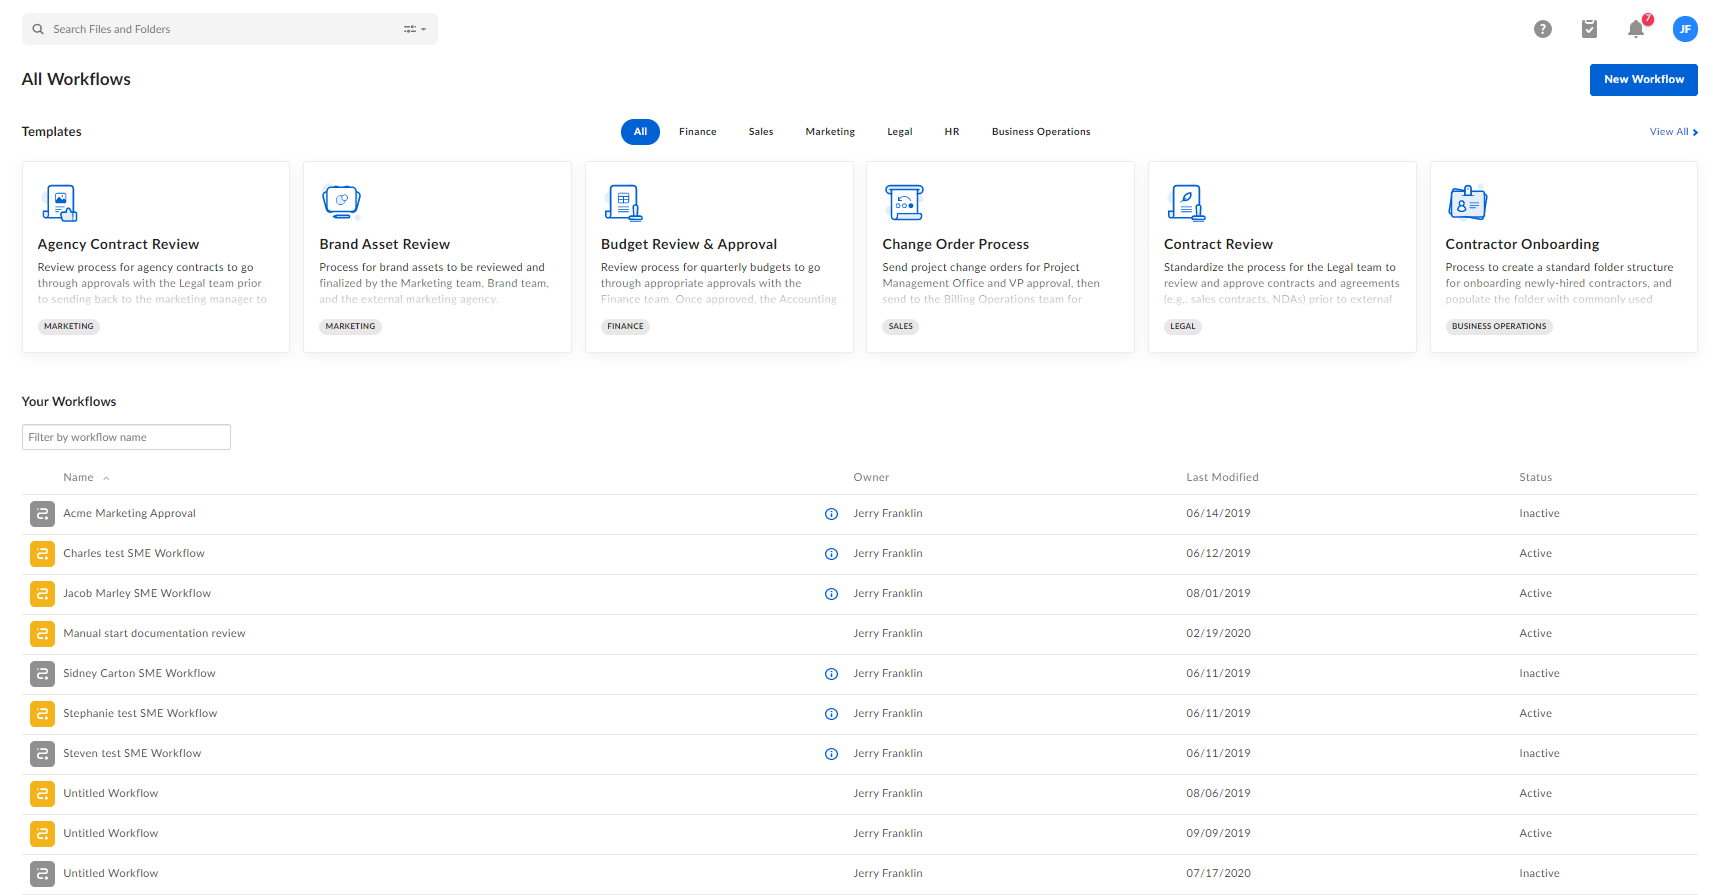
Box provides a robust set of pre-built Relay workflow templates that help you get a jump-start on incorporating workflows into your regular line of business work. To start with, using Relay templates as models help you answer the following:
- How can a workflow apply in my situation? How do I know if I even need one at all?
- How can I tell which processes are appropriate for workflows? Where do I start? Where does the process begin in Relay and where does it end?
- How do I build a workflow? How do I translate my needs into corresponding triggers and outcomes?
Then, when you decide where you can apply a workflow, you can leverage a template to greatly simplify the task of building that workflow.
Relay templates are specific to scenarios typical in various lines of business, such as marketing, HR, legal, or finance. They automate processes around content review and approval and file/folder automations. In so doing, they can remove much manual work and repetitive tasks from your day-to-day work in Box. And when you select a template and open its workflow, you can modify it however you need.
Further, because templates make it simple for anyone to create and initiate a workflow, they also relieve your IT department, or your Box Admins, of the burden of creating workflows for the entire organization.
Using a Box template to create a workflow
- Open Relay and go to the Workflows page.
- The lines of business that offer templates display in a top navigation. Brief descriptions of several specific featured workflows display immediately below.
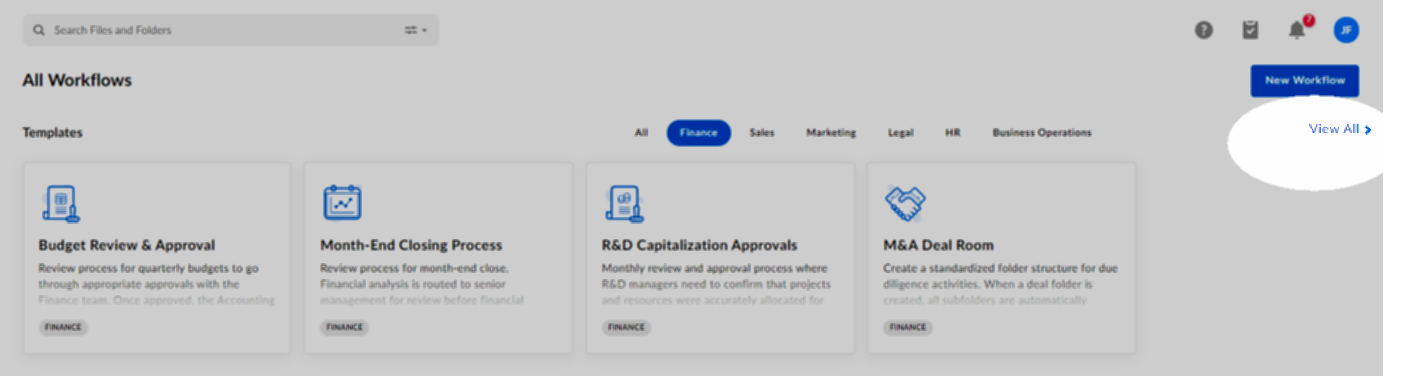
- Click the line of business you want. Box displays the available templates for that line of business. Then click the template you want.
- You can also click one of the featured template descriptions.
- To see every template that’s available, click View All.
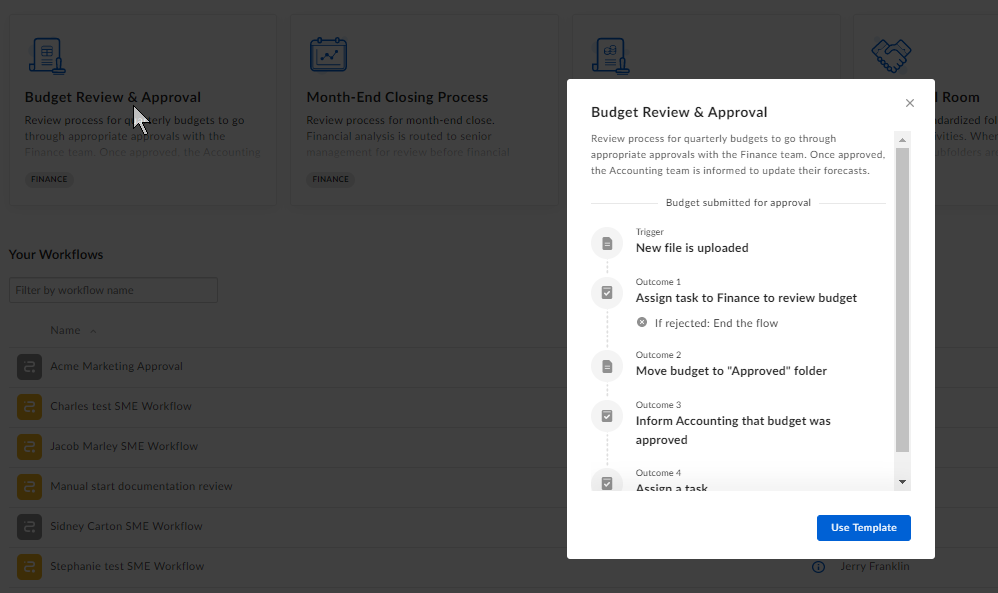
- When you click a template, Box displays a high-level overview of that workflow. Review the workflow, and if you’re satisfied, click Use template. Box opens the builder page displaying each step of the workflow.
- Enter the required information in the steps that are highlighted in purple – for example, task assignees, metadata template, specific file, folder, or collaborator, and so on.
- (Optional) Add or delete additional steps to this workflow as desired.
- Other optional steps include re-naming the workflow, editing its description, and modifying the name of each step.
- When you’re done, click Activate to start the workflow. Or click Save Draft to save the workflow to your Workflows page for later use.
If none of the pre-built templates seem right, you can always create a new workflow from scratch. To do this, click New Workflow.
When you modify a template, then save or activate it, it saves as a discrete workflow in your Relay instance. From there you can review it and monitor its status from your Workflows page. The actual template itself does not change, and is again available to you in its original, unmodified form the next time you select it from the menu of templates.