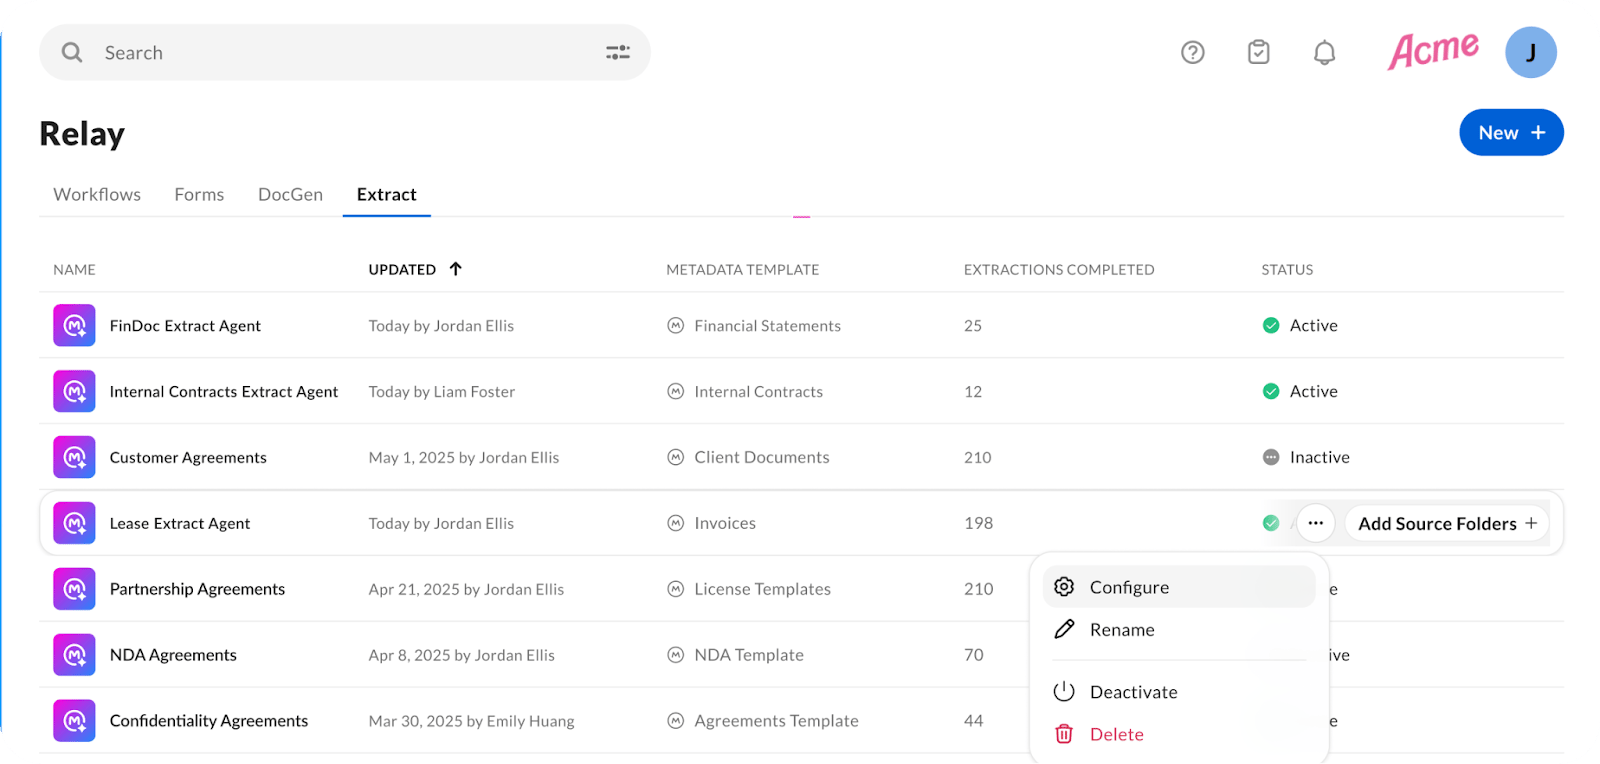
From the Box Extract dashboard, you can configure an Extract agent by selecting on a specific agent:
- Configure
- Agent type
- Select an agent type: Standard Extract Agent or Enhanced Extract Agent.
- Fields and AI Instructions
- Select metadata fields to extract. Box Extract requires at least one field to be enabled. Select the switch in the top right column to enable all metadata fields.
- Add optional AI Instructions per field to improve accuracy.
- Extraction policy and templates
- Choose to Keep existing metadata values or Override metadata values.
- Add and save a metadata template before you attach source folders. After a source folder is attached, the metadata template is locked and you cannot change or replace it.
- Rename
- Set a descriptive agent name, up to 255 characters. Renaming the Custom Extract Agent does not change extraction behavior.
- Deactivate
- Disables the Custom Extract Agent and stops extractions.
- Some extraction processes may still occur after Custom Extract Agent deactivation or deletion.
- Delete
- Deleting a Custom Extract Agent moves it to the Trash (if enabled for your enterprise), from where it can be restored. However, restoring the archived agent requires deactivation then reactivation before it can extract metadata again.
You can add more source folders for the Custom Extract Agent to automatically extract data to.
- Source folders and activation
- Attach up to 10 Box folders as sources to automate extraction processes at scale.
- Select Activate to begin adding source folders after saving the configuration to the Custom Extract Agent.
- Set each folder to Single-level or Recursive. Single-level processes only the files at the folder root. Recursive processes files throughout the full folder hierarchy. You can change this setting for any folder after you add it.
- Backfill extraction, which processes files that already exist in a folder when you attach it, has no file limit.
- Each folder displays the Extract Agents attached to it, so you can review agent coverage from the folder itself.
Resolve folder conflicts
Box Extract processes source folders using metadata cascade policies. A cascade policy is scoped to a unique combination of metadata template and folder, so two Custom Extract Agents that use the same metadata template cannot target the same folder. The same restriction applies between an agent and an existing metadata cascade policy.
When you add several folders at once and one of them conflicts, Box attaches the folders that do not conflict and displays an error for the folders it blocks. Review your extraction sources after a bulk add to confirm which folders attached.
When nested folders have overlapping agents or cascade policies, the closest policy in the hierarchy processes the file. A file in a subfolder is processed by the lowest-level agent or cascade policy that covers it, not by an agent attached to a folder higher in the hierarchy.
Per-file access and edits
- You can view metadata attached to each file directly within Box Preview.
- Edit or enter new values using the pencil icon.
Run reports
- Run History
- Records extraction jobs with job status, source folder, and timestamps.
- Use Run History to verify extraction results or diagnose issues.
- Common workflow (high-level)
- Create
- Configure fields & AI instructions
- Add folders
- Activate
- Monitor via Run History
- Edit metadata as needed
Folder and file names in the Run History of a Custom Extract Agent are displayed exactly as they appeared when the extraction was executed. Last modified on September 2, 2026