

How tool access works
Box MCP server tool access works at two levels: enterprise-wide, and for an individual integration or platform app.
By default, every published integration and unpublished platform app follows your enterprise-wide configuration. That default stays in effect until you set a Custom configuration on the Box MCP Server tab of an individual integration or app, which then takes precedence for that integration or app only.
Box applies settings in this order:
- Custom configuration — When set on an integration or platform app, it applies to that integration or app only.
- Global configuration — Applies to any integration or platform app that doesn’t have its own custom configuration.
Enterprise-wide access
Global configuration applies to every user, and to any integration or platform app that doesn’t have its own custom configuration. To open your enterprise-wide tool settings:- Open the Admin Console.
- In the left sidebar, select Integrations.
- Select the Box MCP Server tab.
- By tool category
- By individual tool
- Or both
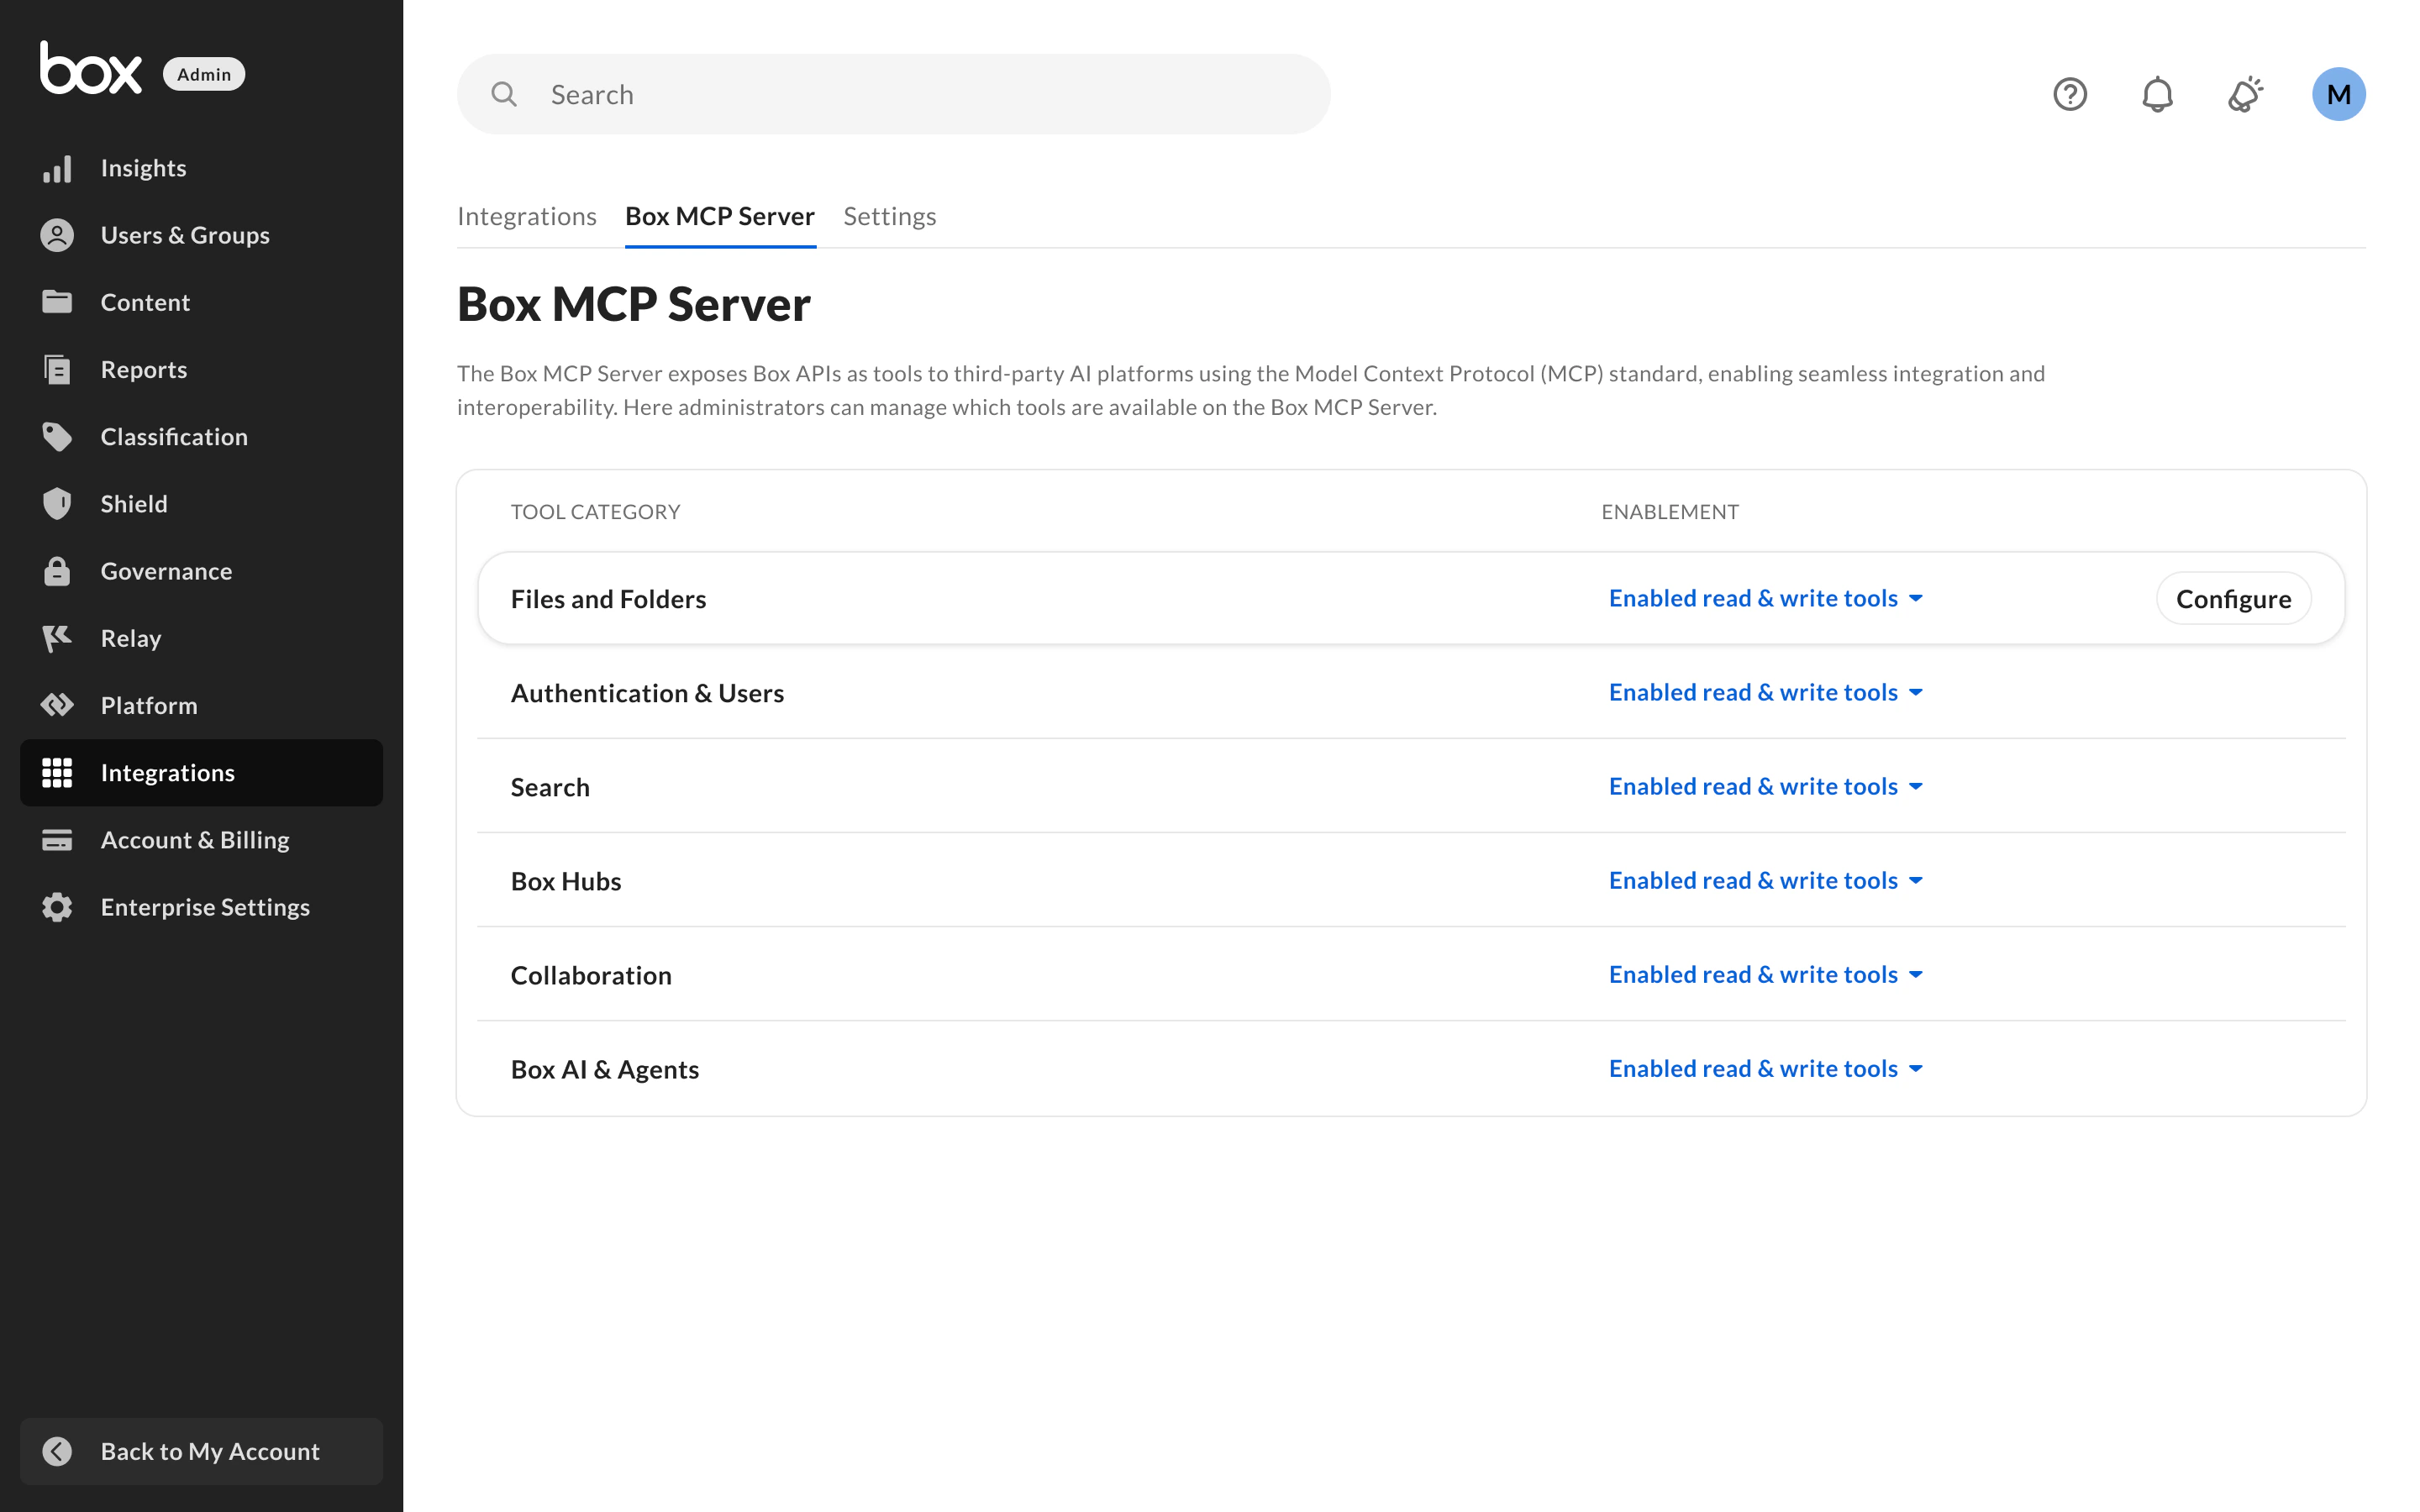
Some categories, such as Box Hubs or Box AI & Agents, might not be available for every enterprise. Check your subscription for details.
Set category access
To set access for an entire category:- In the Box MCP Server table, find the category you want to configure.
- Select its Enablement dropdown.
- Choose one of the following access levels:
- Disable all tools — No tools in the category are available.
- Enable read only tools — Only tools that read data are available.
- Enable read & write tools — All tools in the category are available, including tools that create or modify data.
- Custom configuration — You choose which individual tools in the category are available.
Set individual tool access
To control access of the specific tools within a category:- In the Box MCP Server table, find the category you want to configure.
- Select Configure.
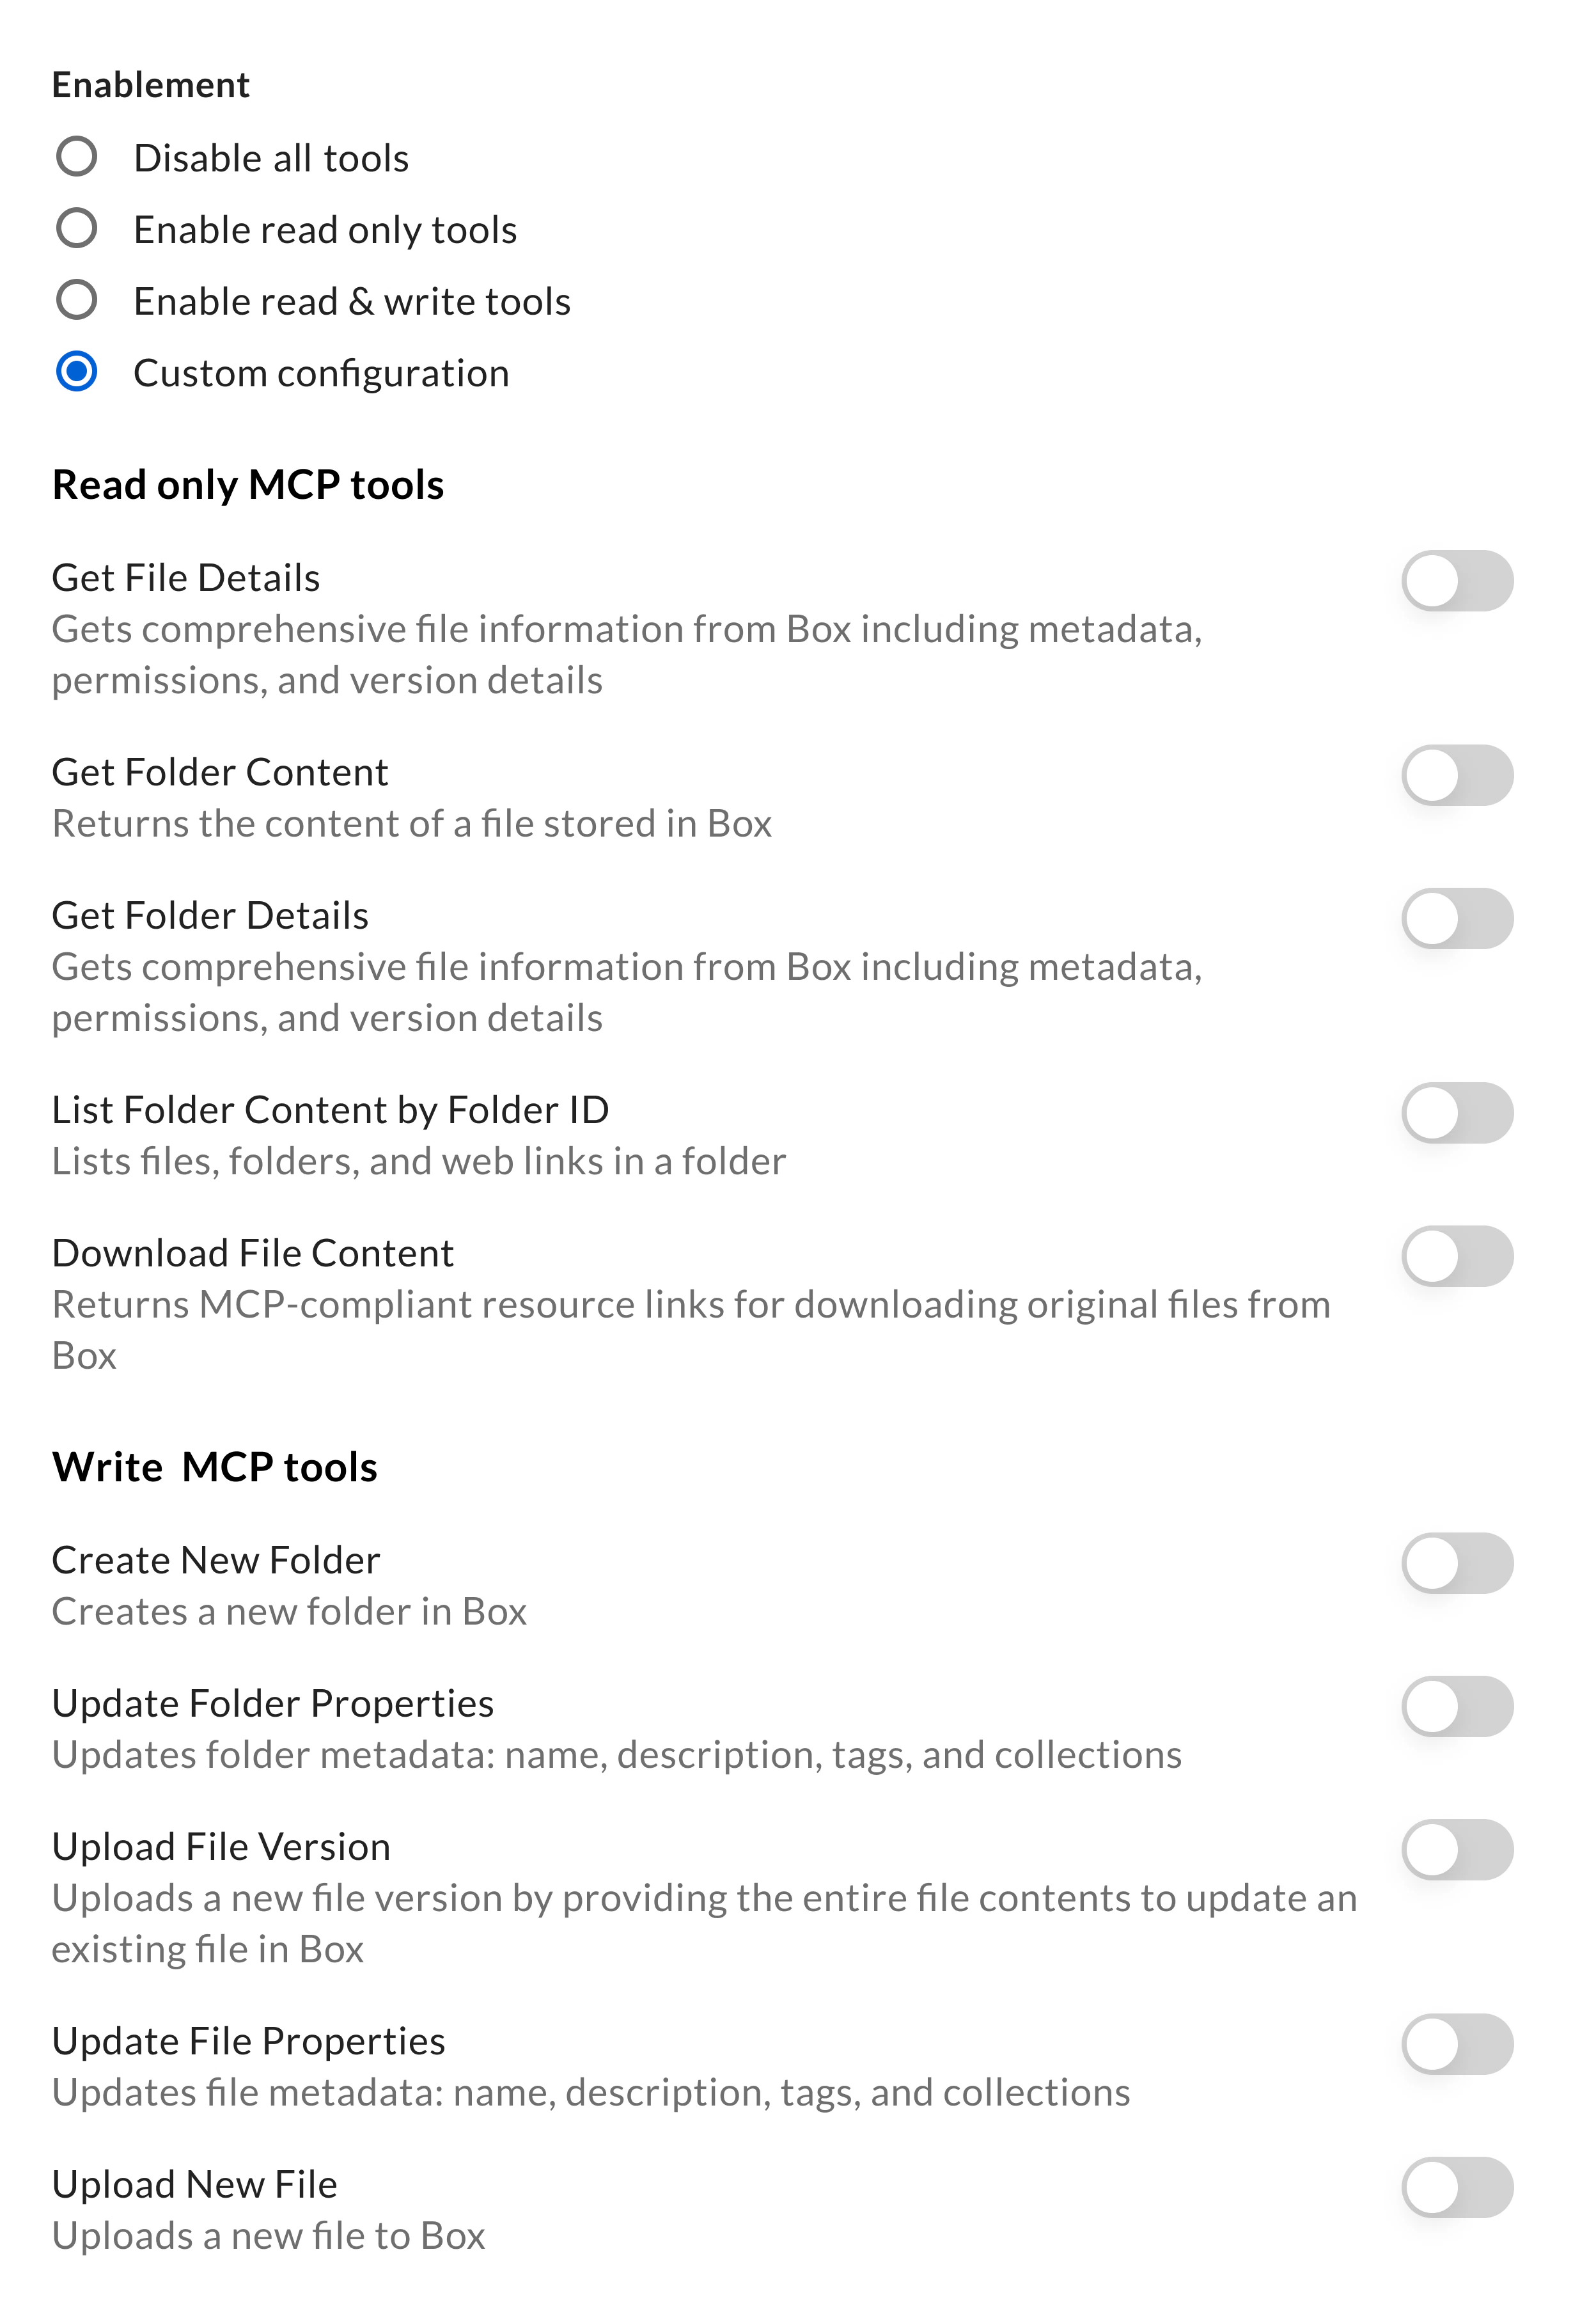
- Selecting an Enablement option updates every toggle in the category.
- Changing an individual toggle updates the Enablement selection: enabling only read tools selects Enable read only tools; enabling all tools selects Enable read & write tools; disabling all tools selects Disable all tools; any other combination selects Custom configuration.
Access for one integration or app
You can also set tool access for a specific integration or platform app, overriding your enterprise-wide default for that integration or app only. This enables you to govern each AI platform separately while keeping one enterprise-wide baseline for everything else. Every integration and platform app has its own Box MCP Server tab, where you choose how it gets its tool access:- Global configuration — It inherits your enterprise-wide settings. This is the default.
- Custom configuration — You set tool access for this integration or app only, overriding the enterprise-wide settings.
A custom configuration applies to every user who has access to the integration or app. Per-user and per-group controls aren’t supported.
Set tool access for an integration
- Open the Admin Console.
- In the left sidebar, select Integrations.
- Find the integration you want to configure. To narrow the list, filter it to the MCP category or search by name.
- Select Configure for that integration.
- In the window that opens, select the Box MCP Server tab.
- Select Custom configuration.
- Select a category to expand it, then use each tool’s toggle to enable or disable it. To narrow the list to a specific scope, select the All, Read only, or Write only filter above the categories.
- Select Save.
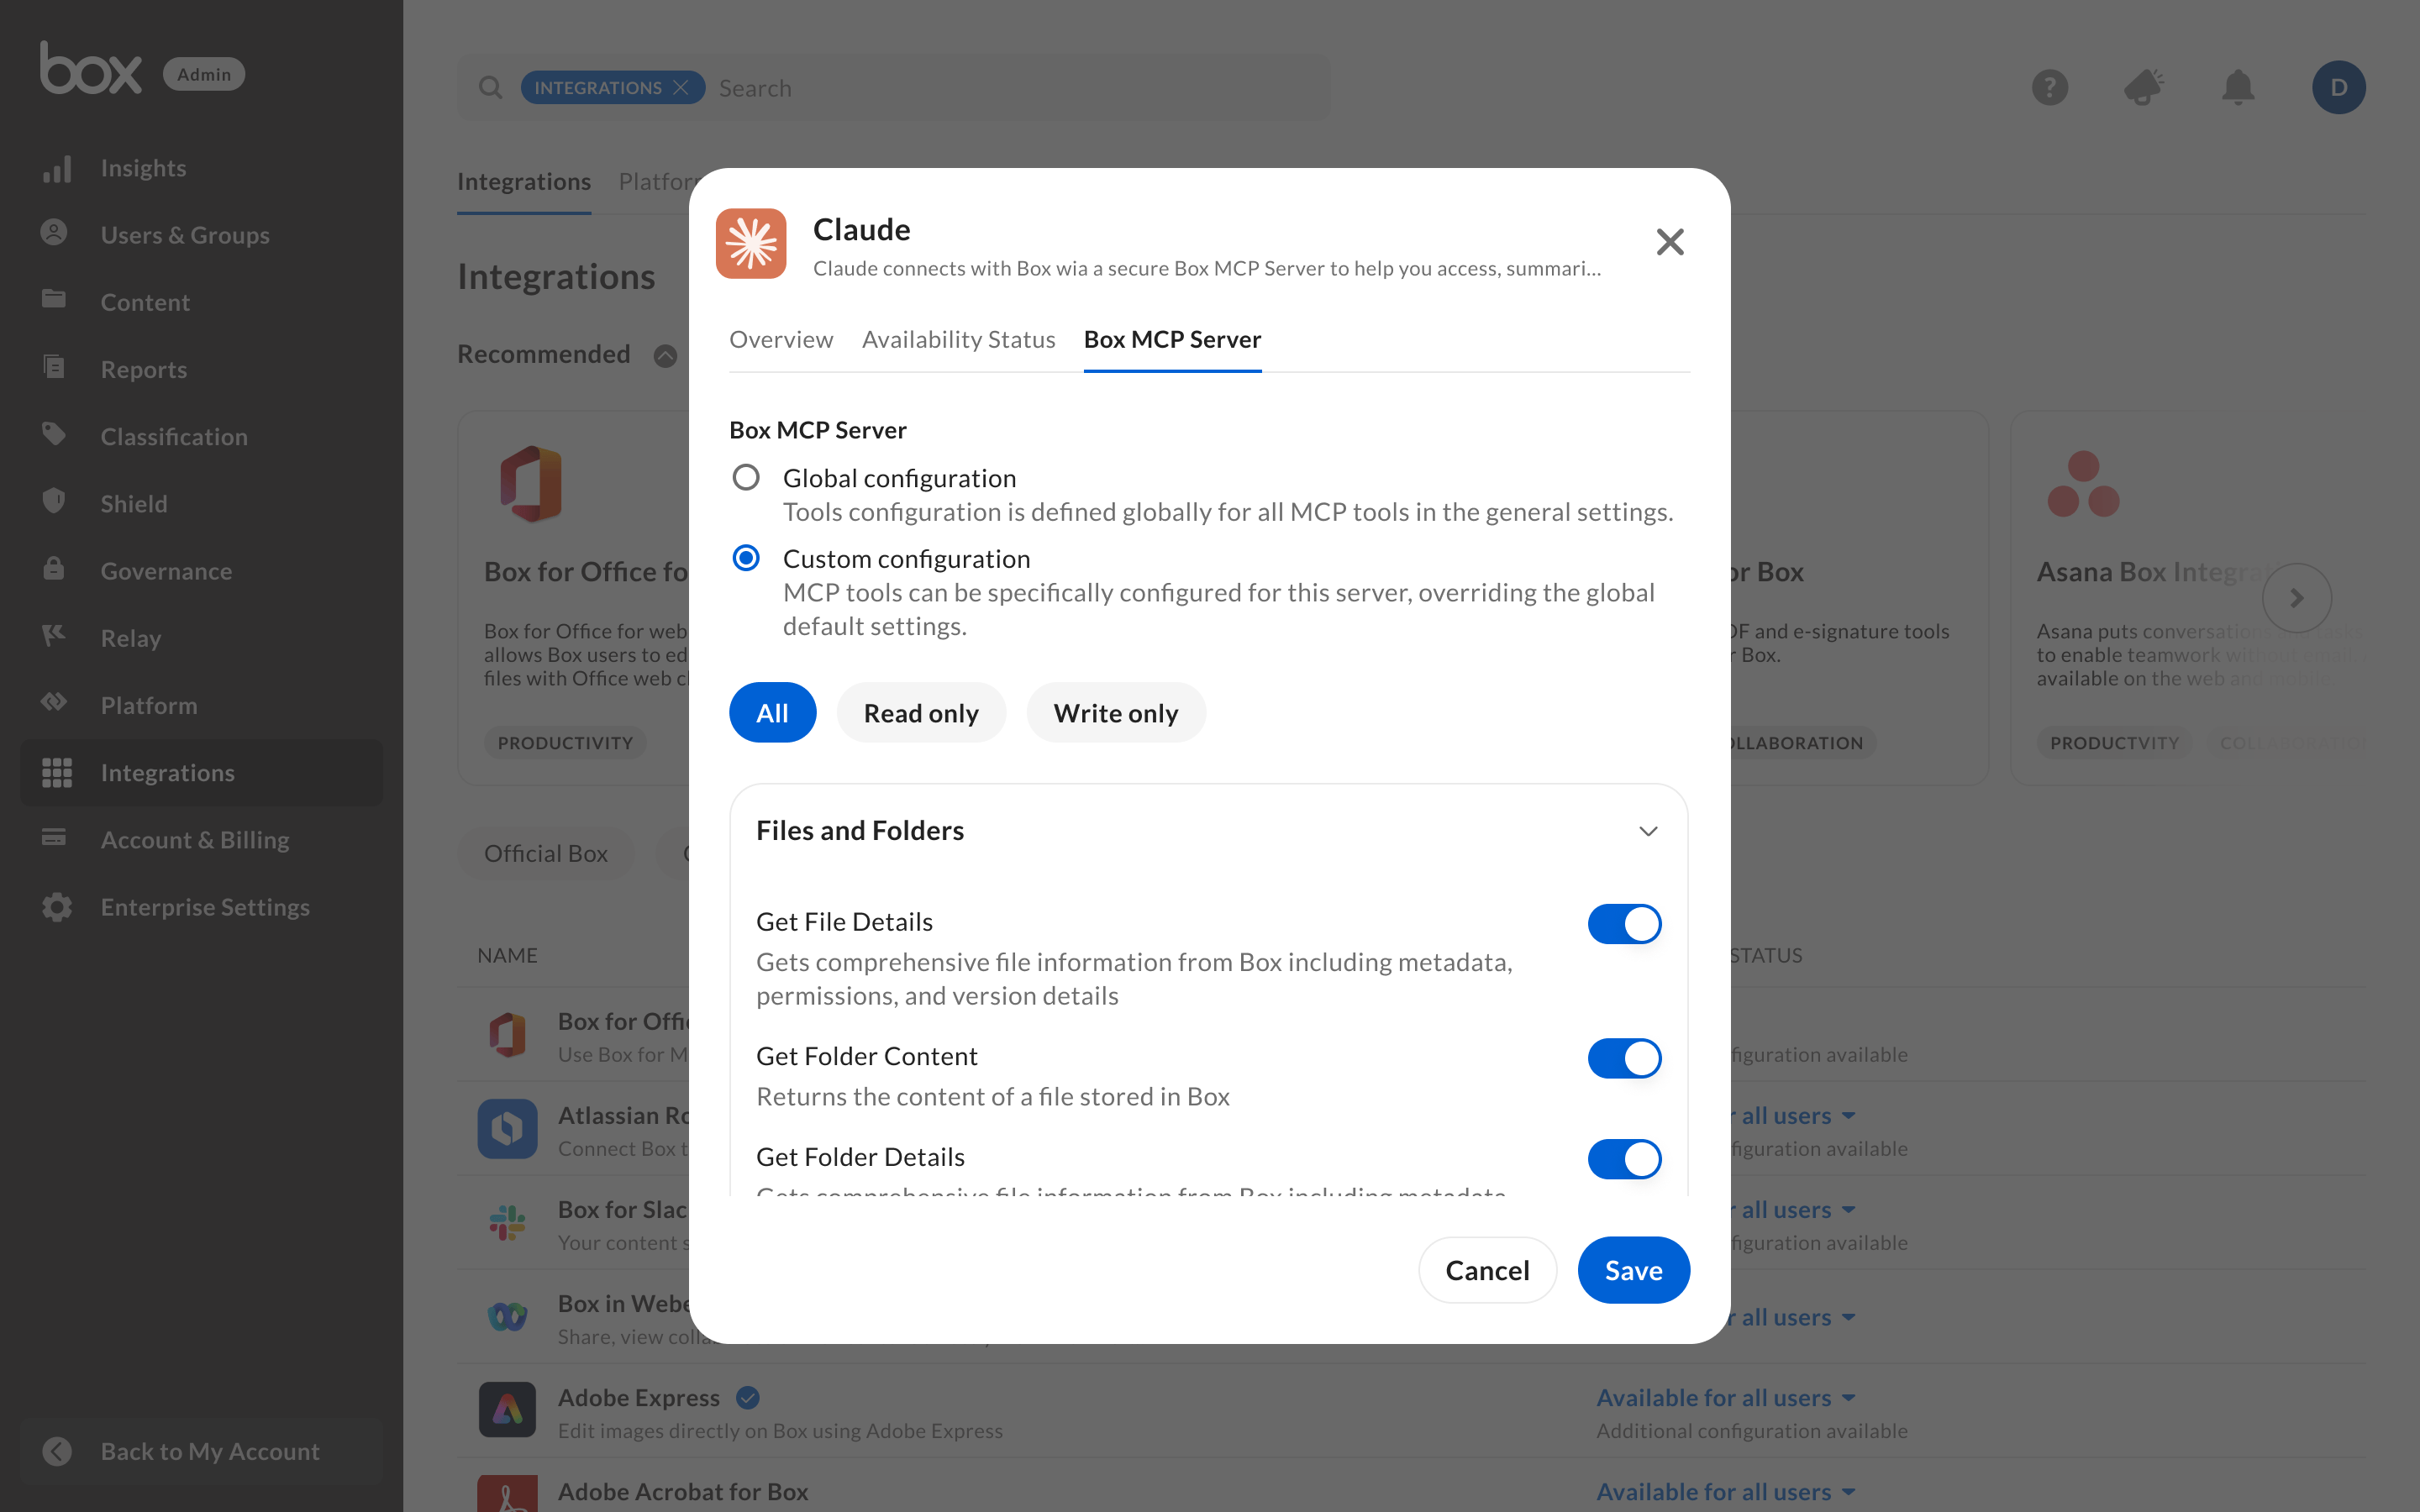
The Box MCP Server tab controls which tools an integration can use. To control whether managed users and groups can access the integration at all, use the Availability Status tab instead. Both tabs have a Custom configuration option, but they govern different things.
Set tool access for a platform app
- Open the Admin Console.
- In the left sidebar, select Platform.
- From the top of the window, select the Platform Apps tab.
- Find the app you want to configure, then select its name.
- On the app details page, select the Box MCP Server tab.
- Select Custom configuration.
- Select a category to expand it, then use each tool’s toggle to enable or disable it. Your changes apply immediately.
When you disable a tool
When you disable a tool, either enterprise-wide or for a specific integration or platform app:- Box removes it from the tool list returned to the MCP client.
- Agents can no longer discover or use it.
- Box enforces the change at runtime.
- The MCP Server returns an error such as:
Tool has been disabled by the enterprise admin. Contact your enterprise admin for more information.During an active session, the user might instead see a generic error, such as “tool not found.” The exact message depends on the MCP client.
Some MCP clients cache the tool list. After you enable or disable a tool, an agent might still reference a cached list, either trying to call a tool that’s no longer available or not yet seeing a newly enabled one. If this happens, close and reopen the MCP client so it fetches an updated tool list.
Audit tool changes
To review when and how tool settings changed, including changes to a specific integration or platform app:- Open the Admin Console.
- In the left sidebar, select Reports.
- Select Create Report, then select Security Logs.
- Under Integrations, select Changed MCP Tools Enablement Status.
For more information, see Security Logs Report.