> ## Documentation Index
> Fetch the complete documentation index at: https://docs.box.com/llms.txt
> Use this file to discover all available pages before exploring further.
# Adding Conditional Fields
## Adding Conditional Fields
In Box Sign, you can use conditional fields to create dynamic, responsive documents with fields that adapt based on signer input. This conditional logic streamlines the signing process, ensuring signers only view, fill, and sign the relevant fields that are exposed and assigned to them based on how they completed other fields within the signature request.
Example use cases for the conditional fields include :
* “Yes/No” Questionnaires that show or hide text fields based on radio button or check box selections. For example, display a mandatory text box for more information if the recipient selects the “yes” check box or radio button.
* The identification request section of an application or questionnaire, where a mandatory signer attachment field is exposed if the recipient selects a “yes” check box or radio button requesting identification via a driver’s license or other government issued ID.
**Note:**
Conditional fields are available in Enterprise Plus and Enterprise Advanced plans only.


 ## Configuring Conditional Logic in a Field
Conditional logic determines which fields appear or remain hidden based on field settings configured by the sender or template creator. Follow these steps to configure fields with conditional logic [when preparing a signature request](/en/box-sign/sending-a-document-for-signature#step-4-preparing-the-request):
1. Create or Modify a signature request or reusable template.
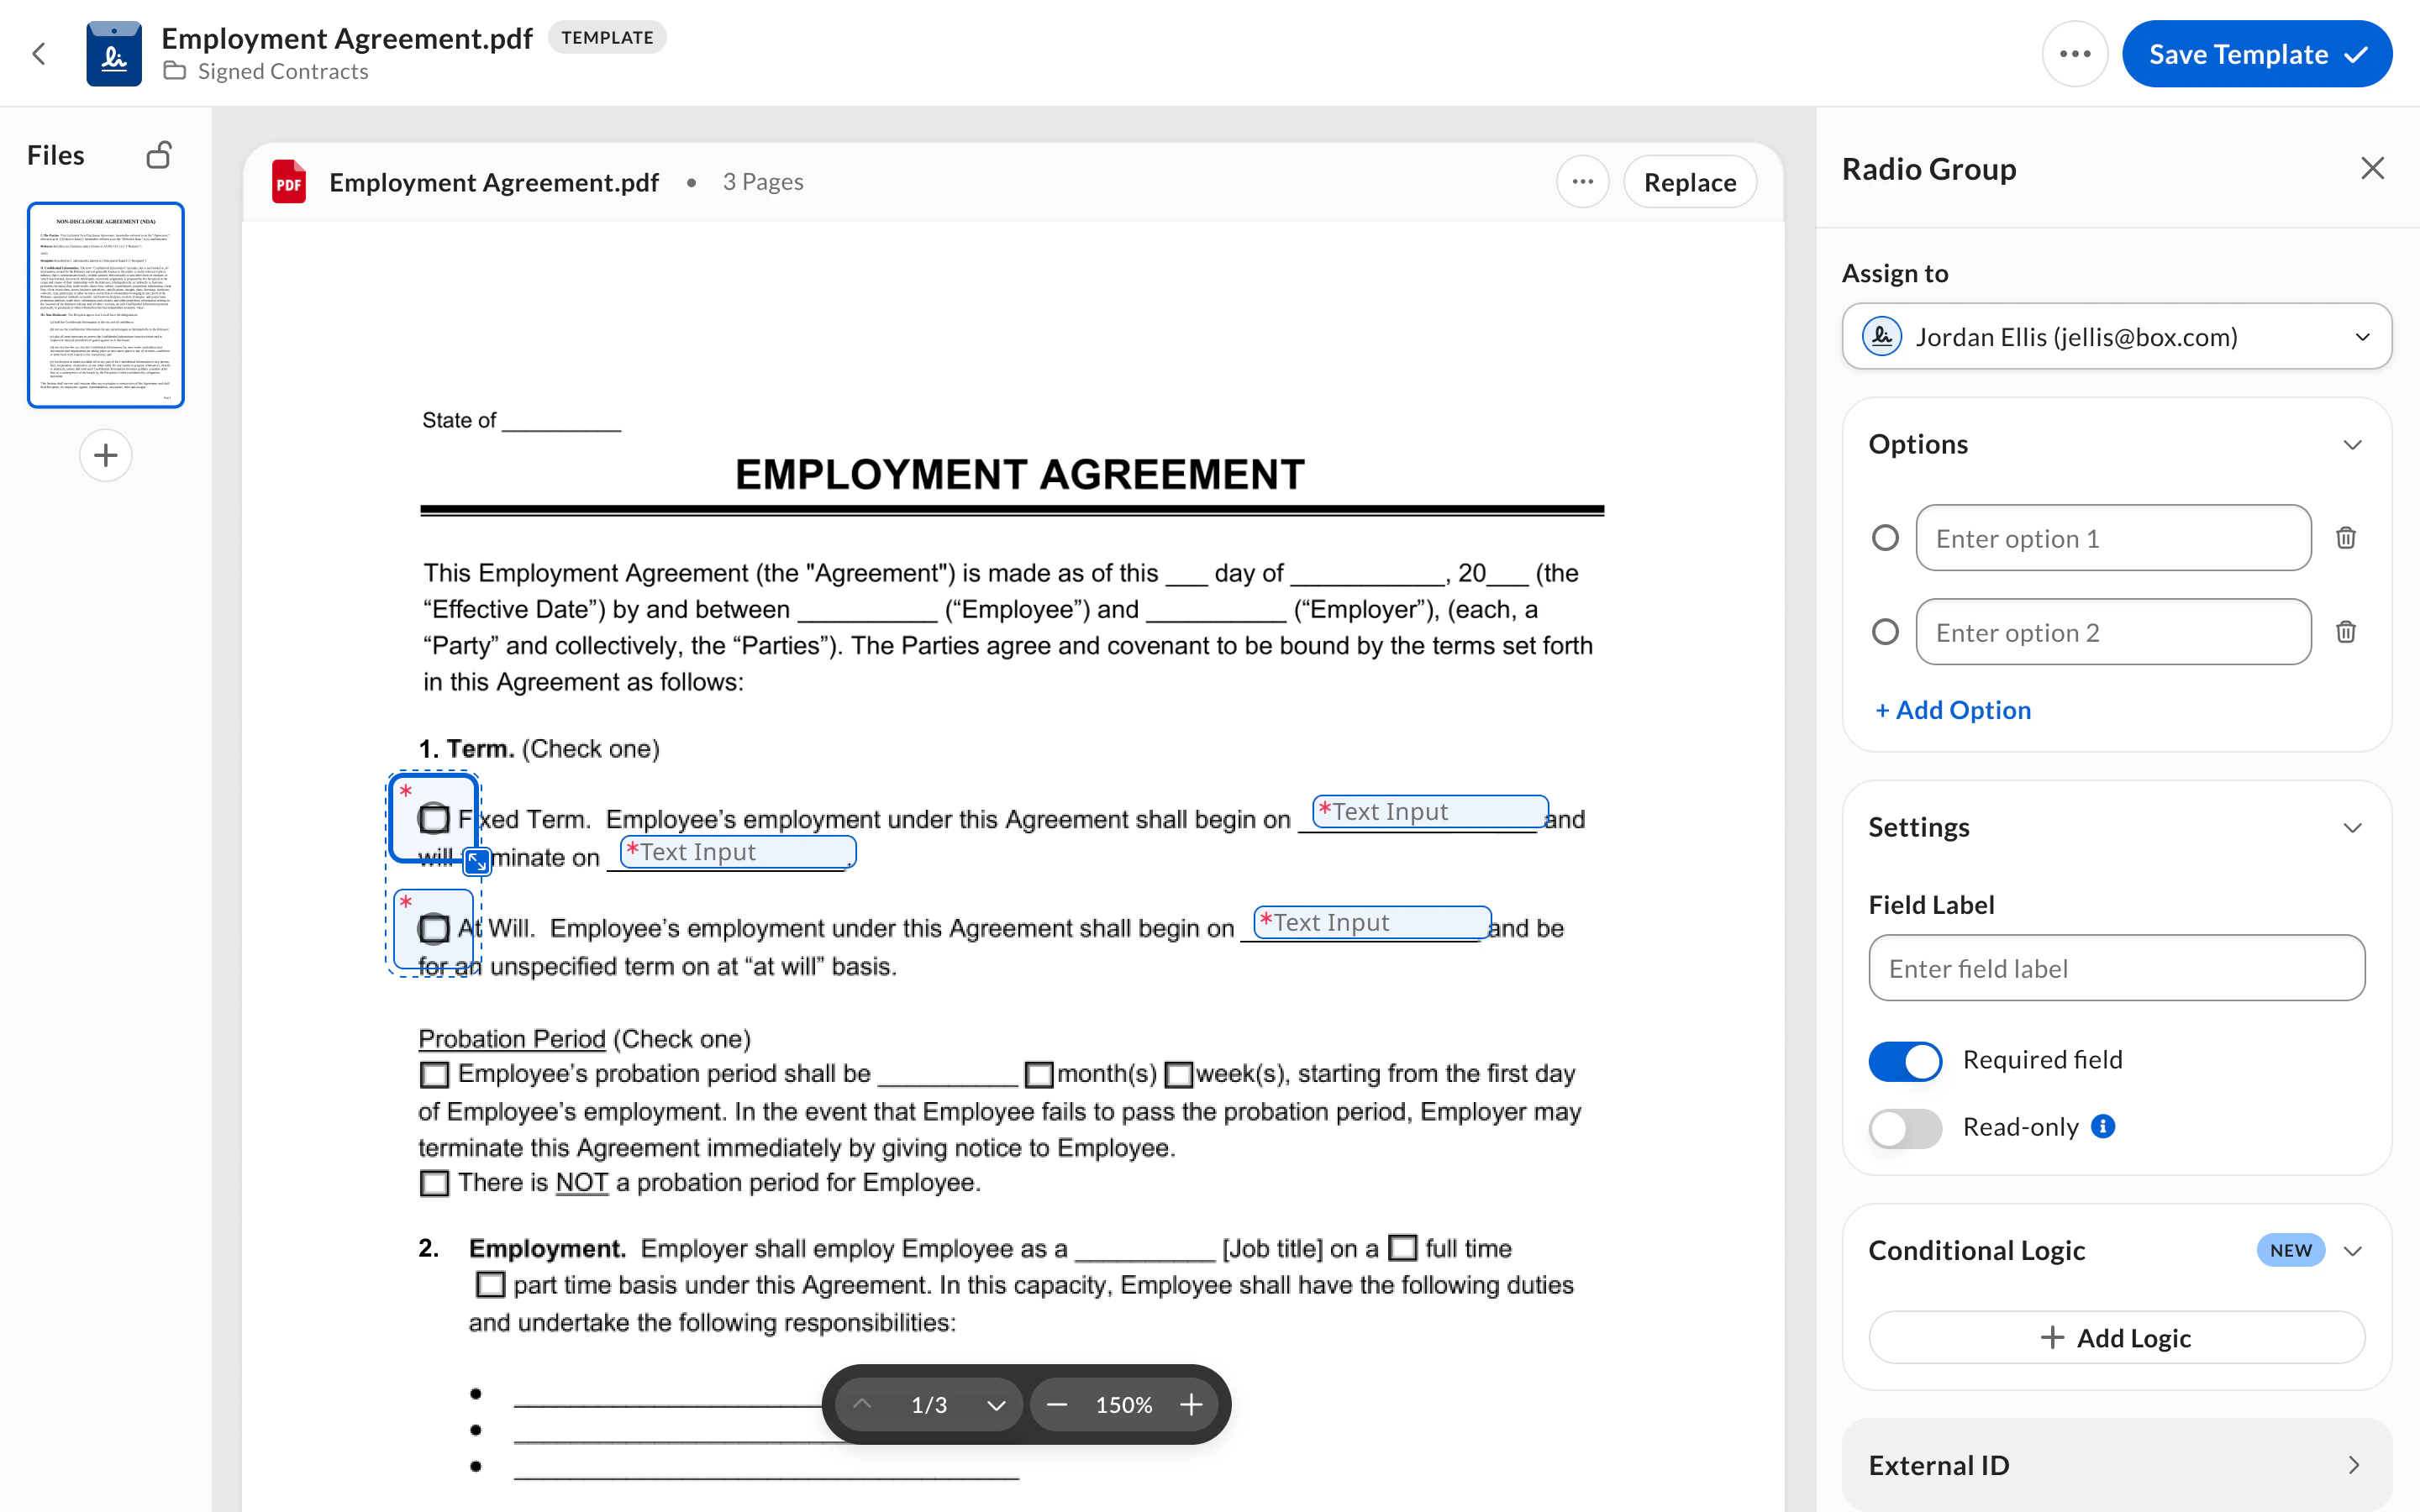
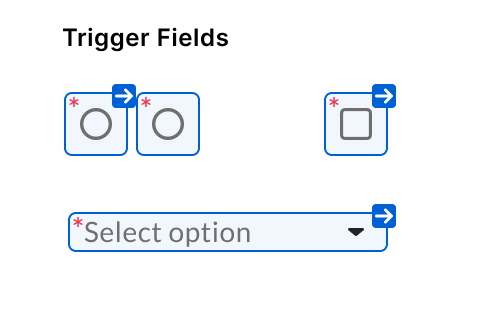
2. Add drag and drop any of the following fields to be used as a **Trigger Field**:
* Checkbox
* Dropdown
* Radio button group
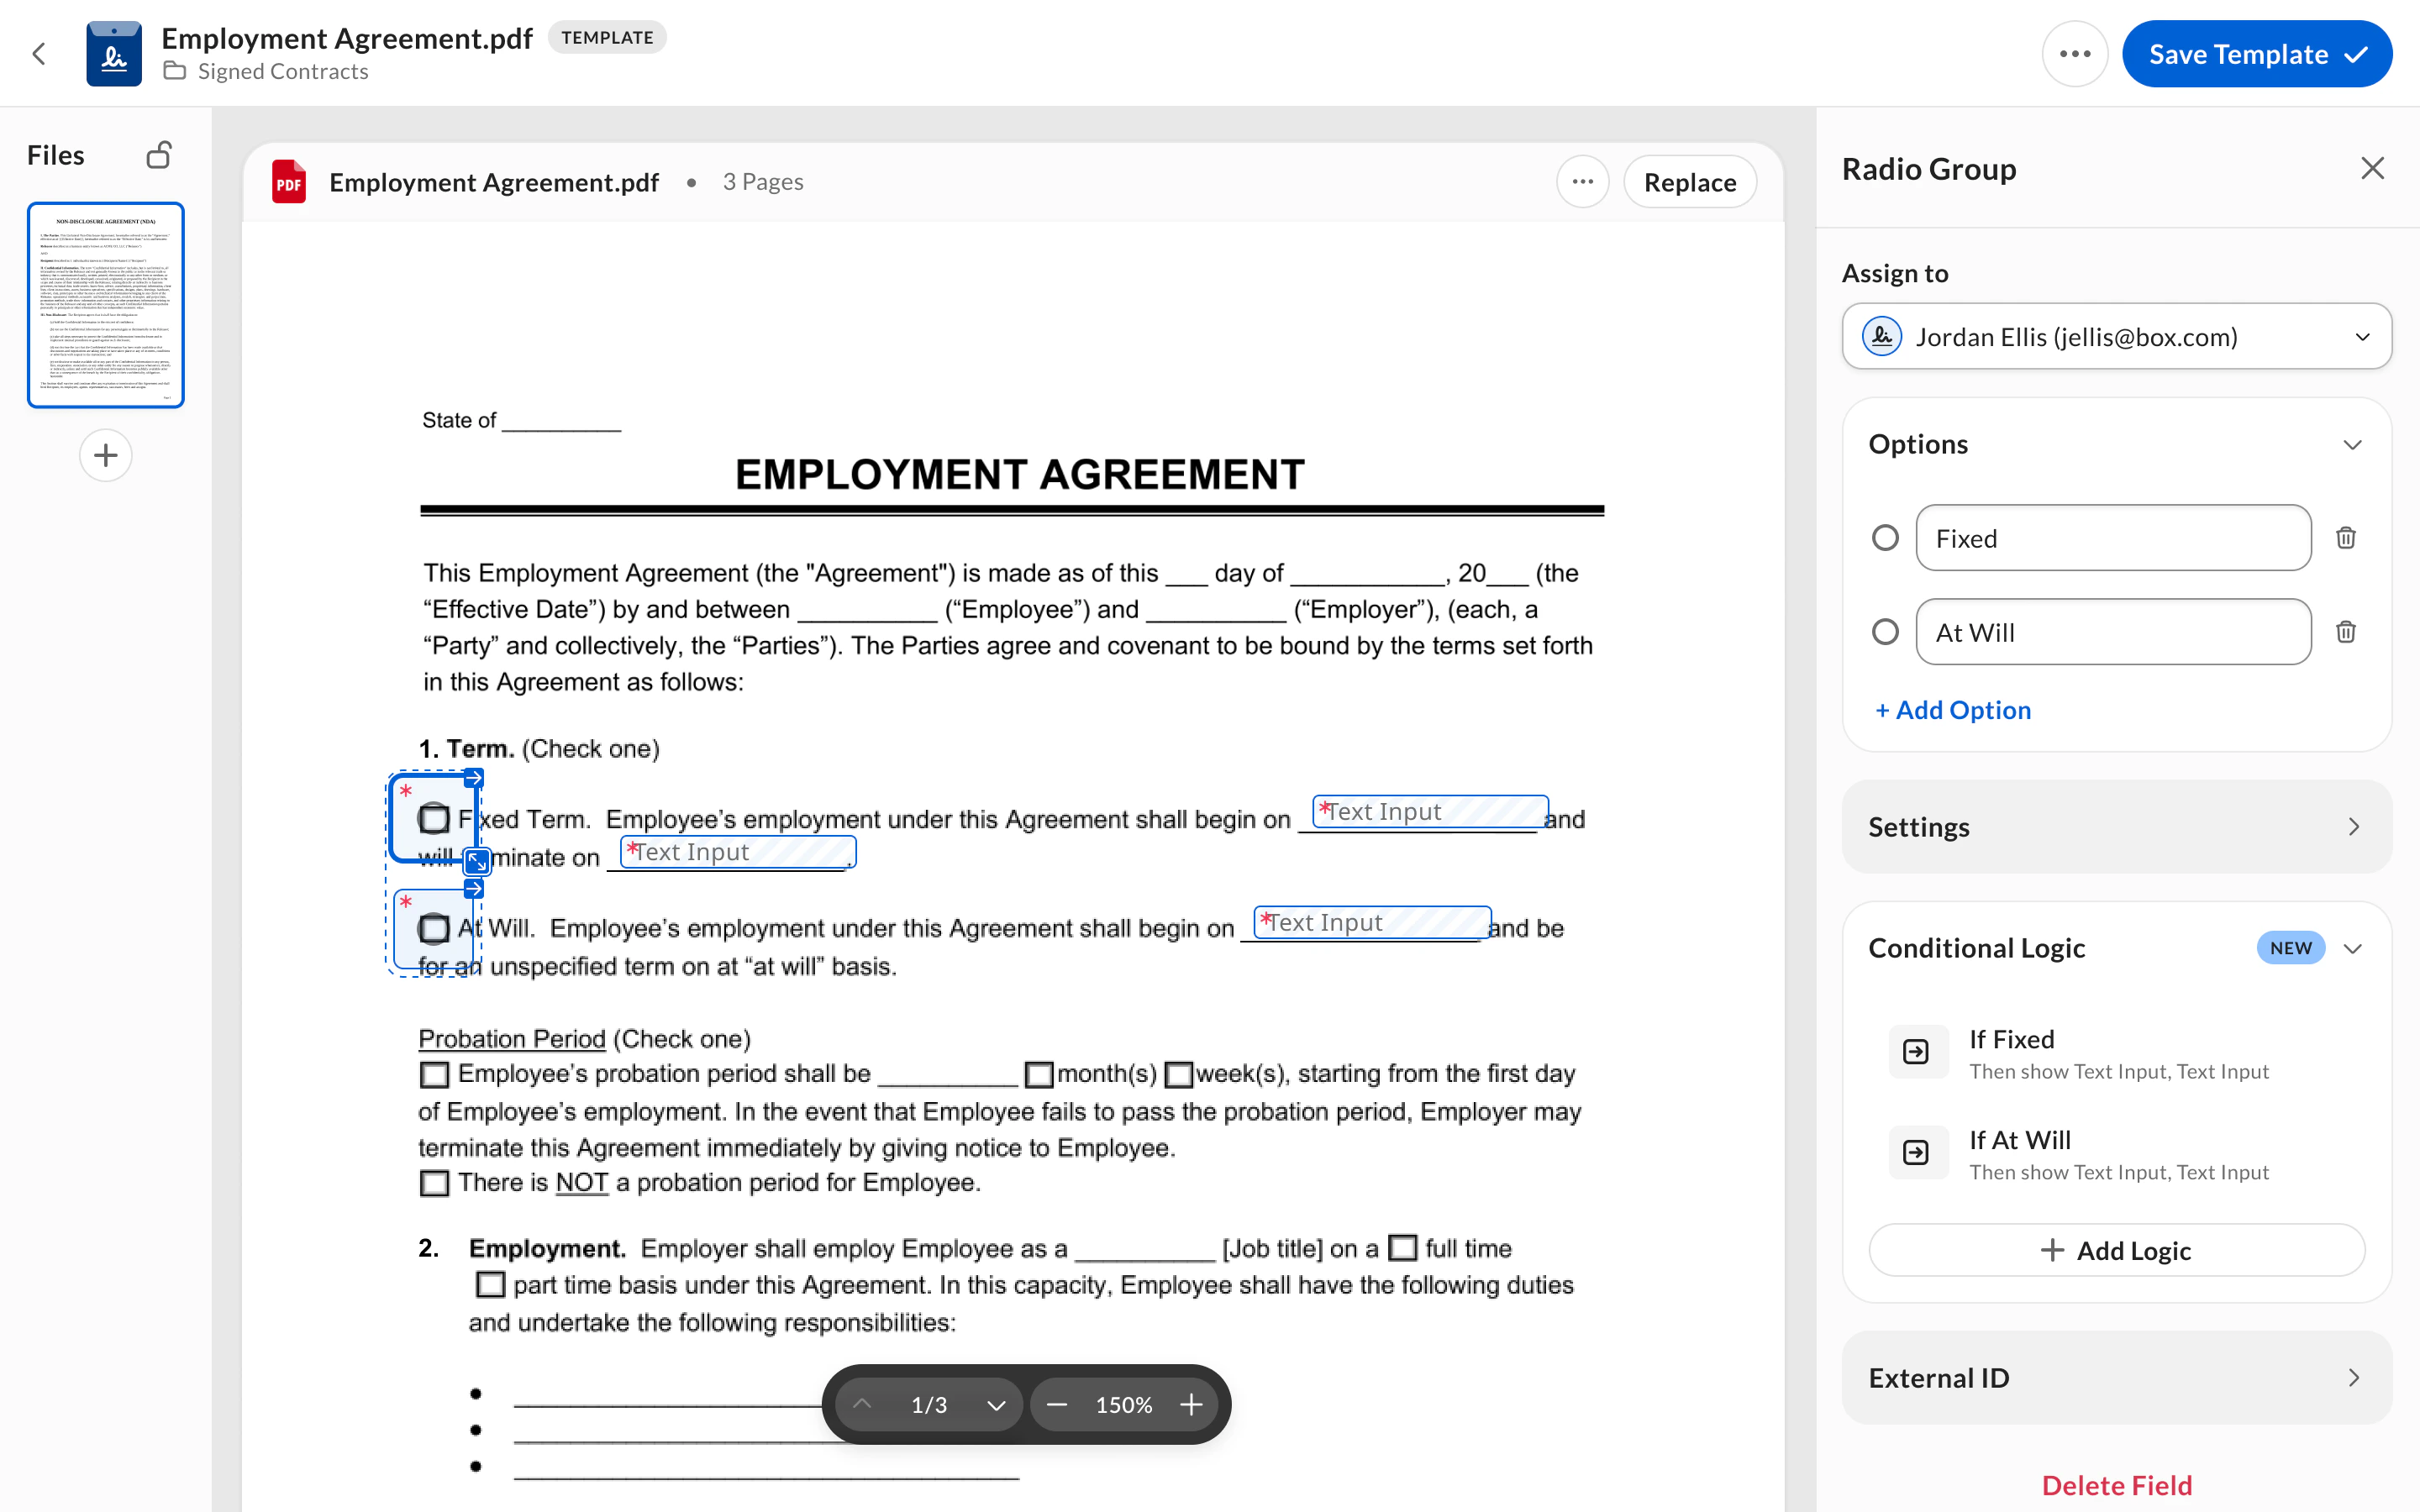
3. Click the **+ Add New Logic** button in the **Conditional Logic** section of the field properties menu.
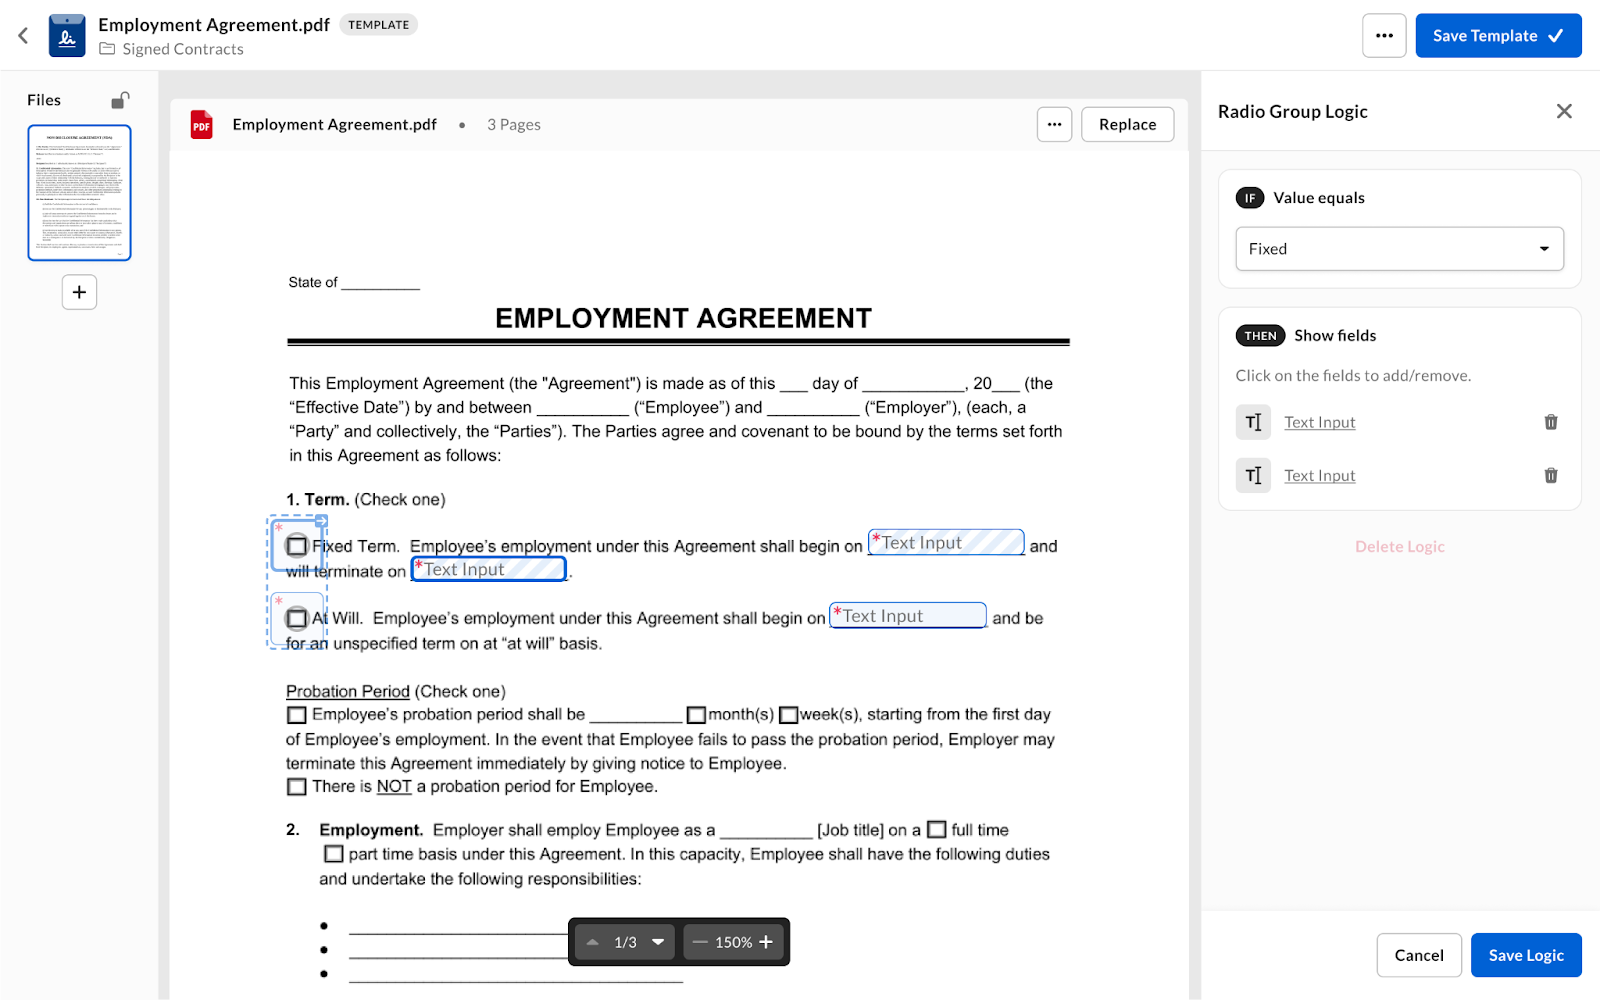
4. Define the Condition:
* For checkboxes: Choose between **Checked** or **Unchecked**.
* For radio buttons and dropdowns: Select a specific option as the condition.
5. Set the outcome:
1. Select one or more fields to become visible by clicking them in the document preparation experience.
2. Any field type can be used as an outcome field.
3. Outcome fields remain hidden for signers and are only exposed once the rule defined by the conditional logic is true.
6. Click **Save** to apply your conditional logic.
## Configuring Conditional Logic in a Field
Conditional logic determines which fields appear or remain hidden based on field settings configured by the sender or template creator. Follow these steps to configure fields with conditional logic [when preparing a signature request](/en/box-sign/sending-a-document-for-signature#step-4-preparing-the-request):
1. Create or Modify a signature request or reusable template.
2. Add drag and drop any of the following fields to be used as a **Trigger Field**:
* Checkbox
* Dropdown
* Radio button group
3. Click the **+ Add New Logic** button in the **Conditional Logic** section of the field properties menu.
4. Define the Condition:
* For checkboxes: Choose between **Checked** or **Unchecked**.
* For radio buttons and dropdowns: Select a specific option as the condition.
5. Set the outcome:
1. Select one or more fields to become visible by clicking them in the document preparation experience.
2. Any field type can be used as an outcome field.
3. Outcome fields remain hidden for signers and are only exposed once the rule defined by the conditional logic is true.
6. Click **Save** to apply your conditional logic.
 7. **(Optional)** Review the conditional logic settings:
1. Click on the trigger or the outcome field(s) to verify that the conditional logic was created and with the configured settings.
7. **(Optional)** Review the conditional logic settings:
1. Click on the trigger or the outcome field(s) to verify that the conditional logic was created and with the configured settings.
 **Note:**
During a conditional logic creation process, a majority of the actions, such as moving, deleting, adding new fields, or configuring fields, are disabled.
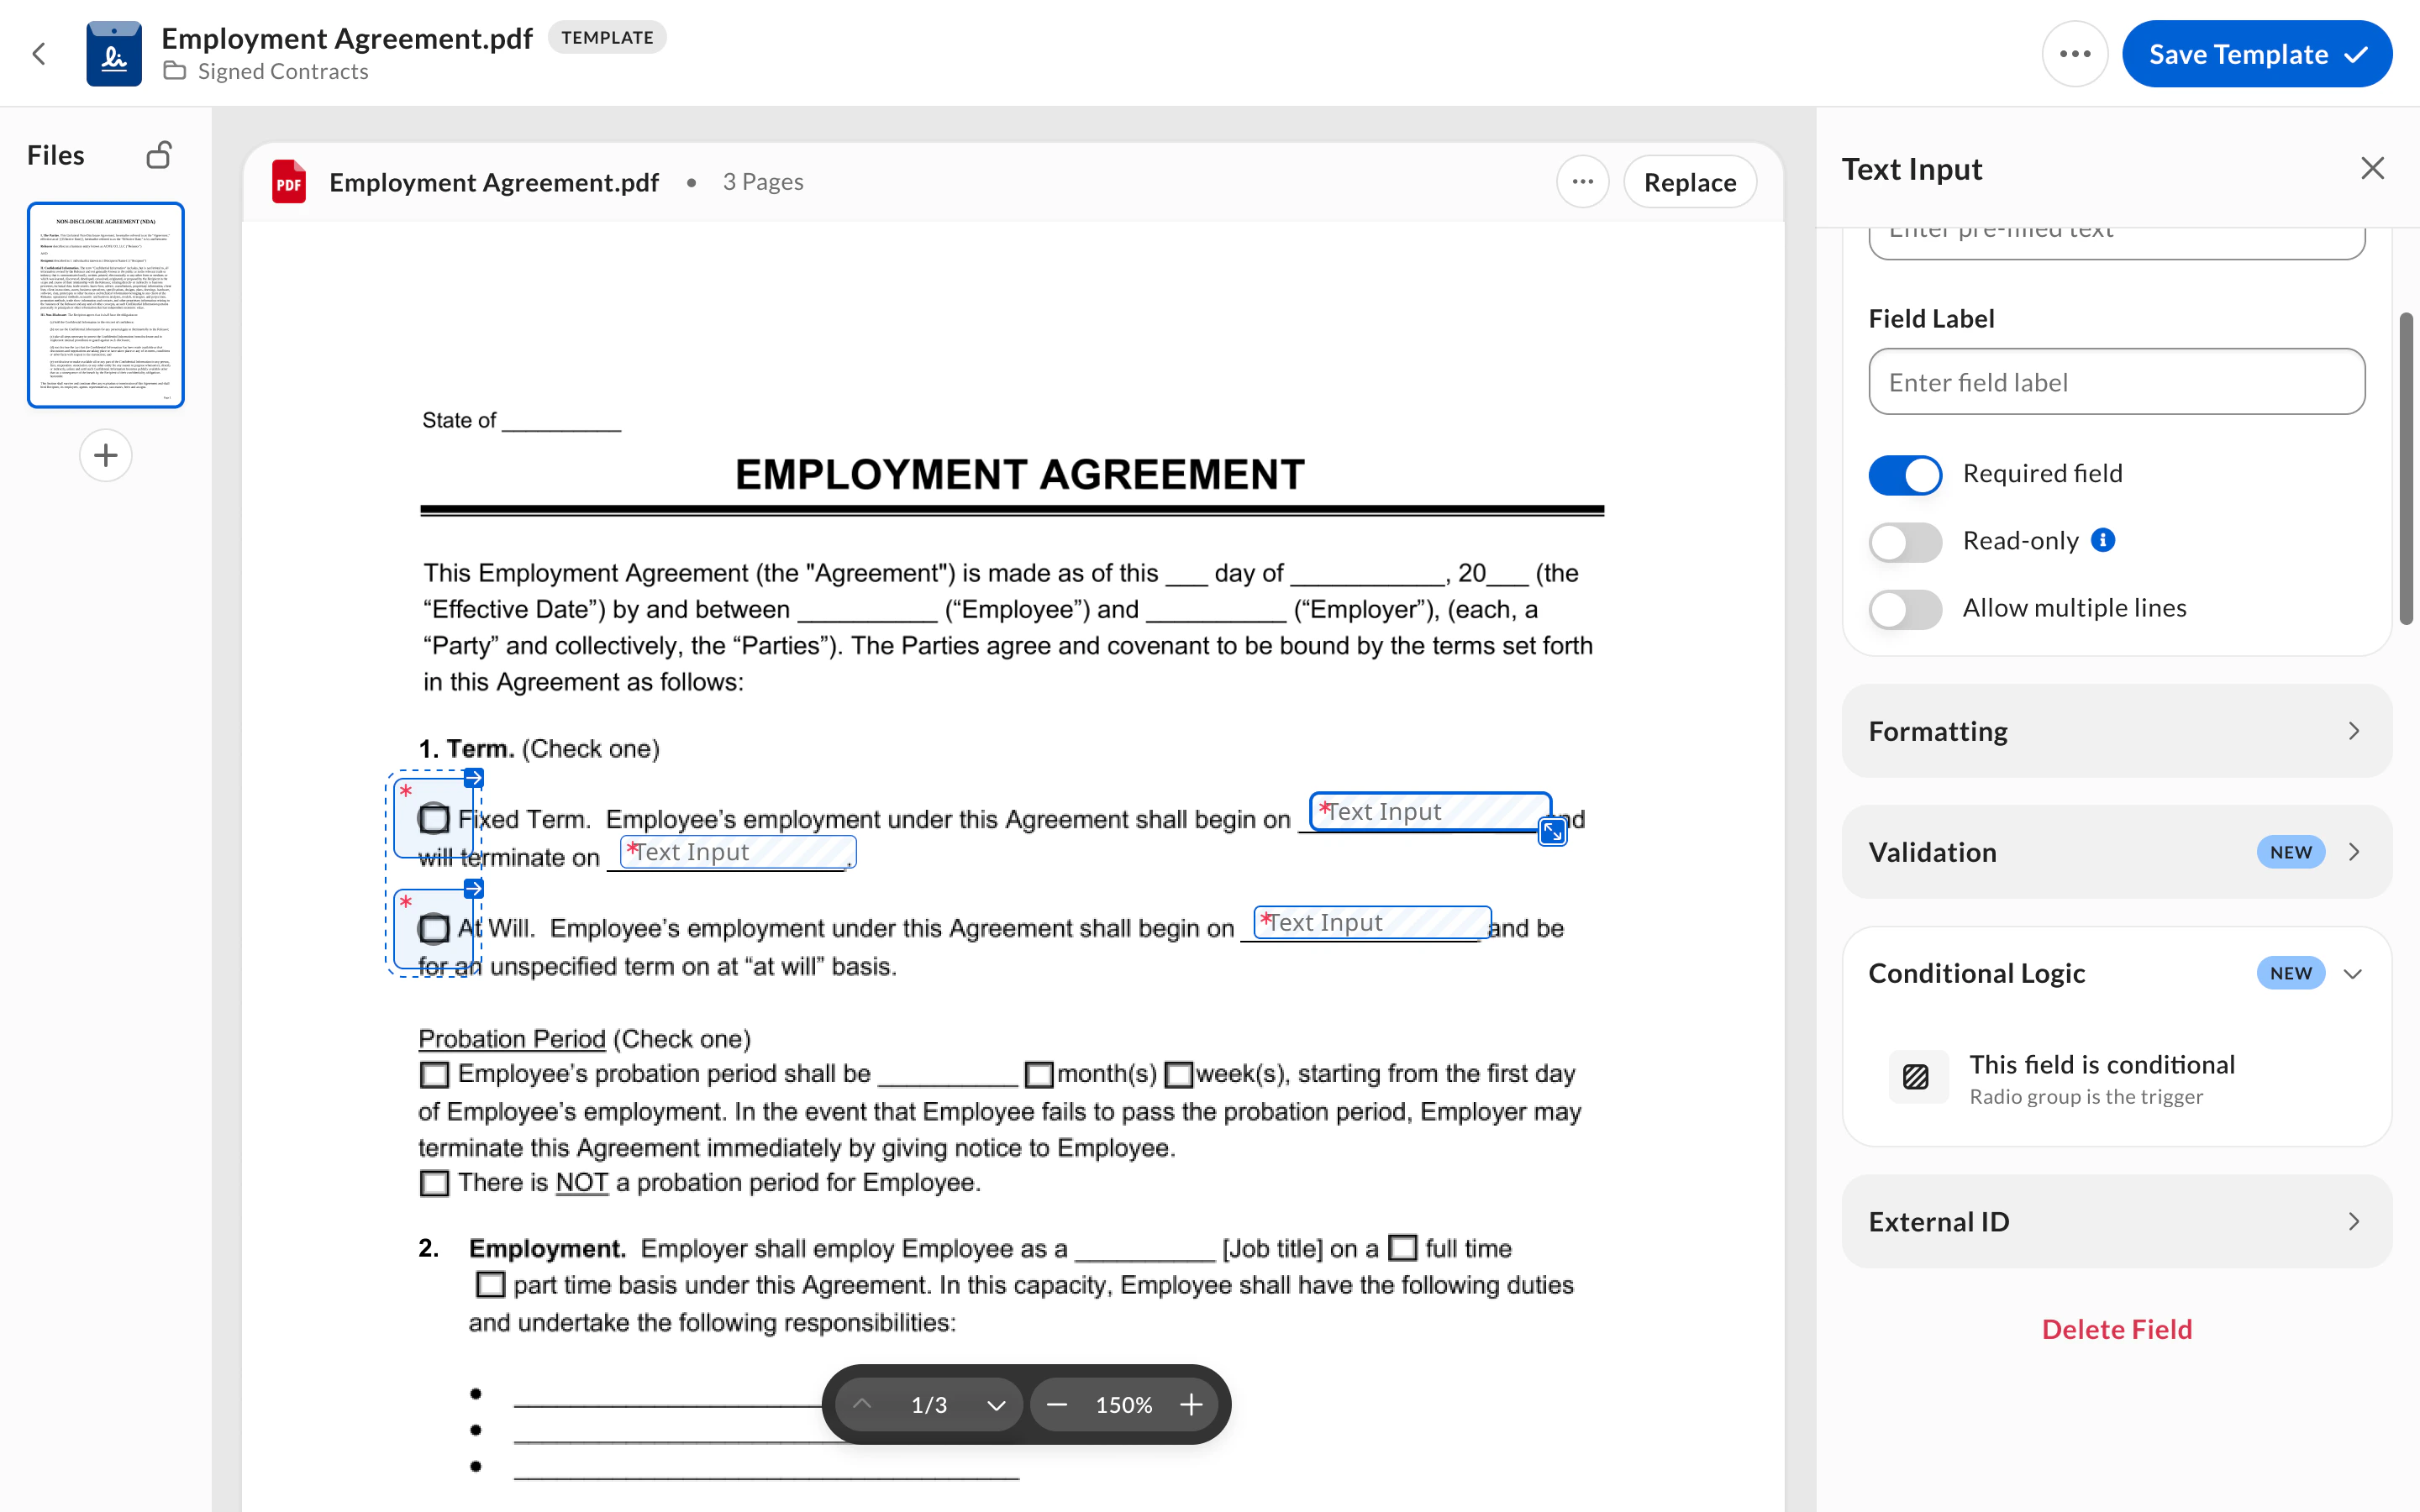
## Conditional Logic Indicators
Fields with applied conditional logic are visually marked with a striped background. This helps identify conditional fields within your document.
Trigger fields have a blue arrow.
**Note:**
During a conditional logic creation process, a majority of the actions, such as moving, deleting, adding new fields, or configuring fields, are disabled.
## Conditional Logic Indicators
Fields with applied conditional logic are visually marked with a striped background. This helps identify conditional fields within your document.
Trigger fields have a blue arrow.

 ## Managing Conditional Logic
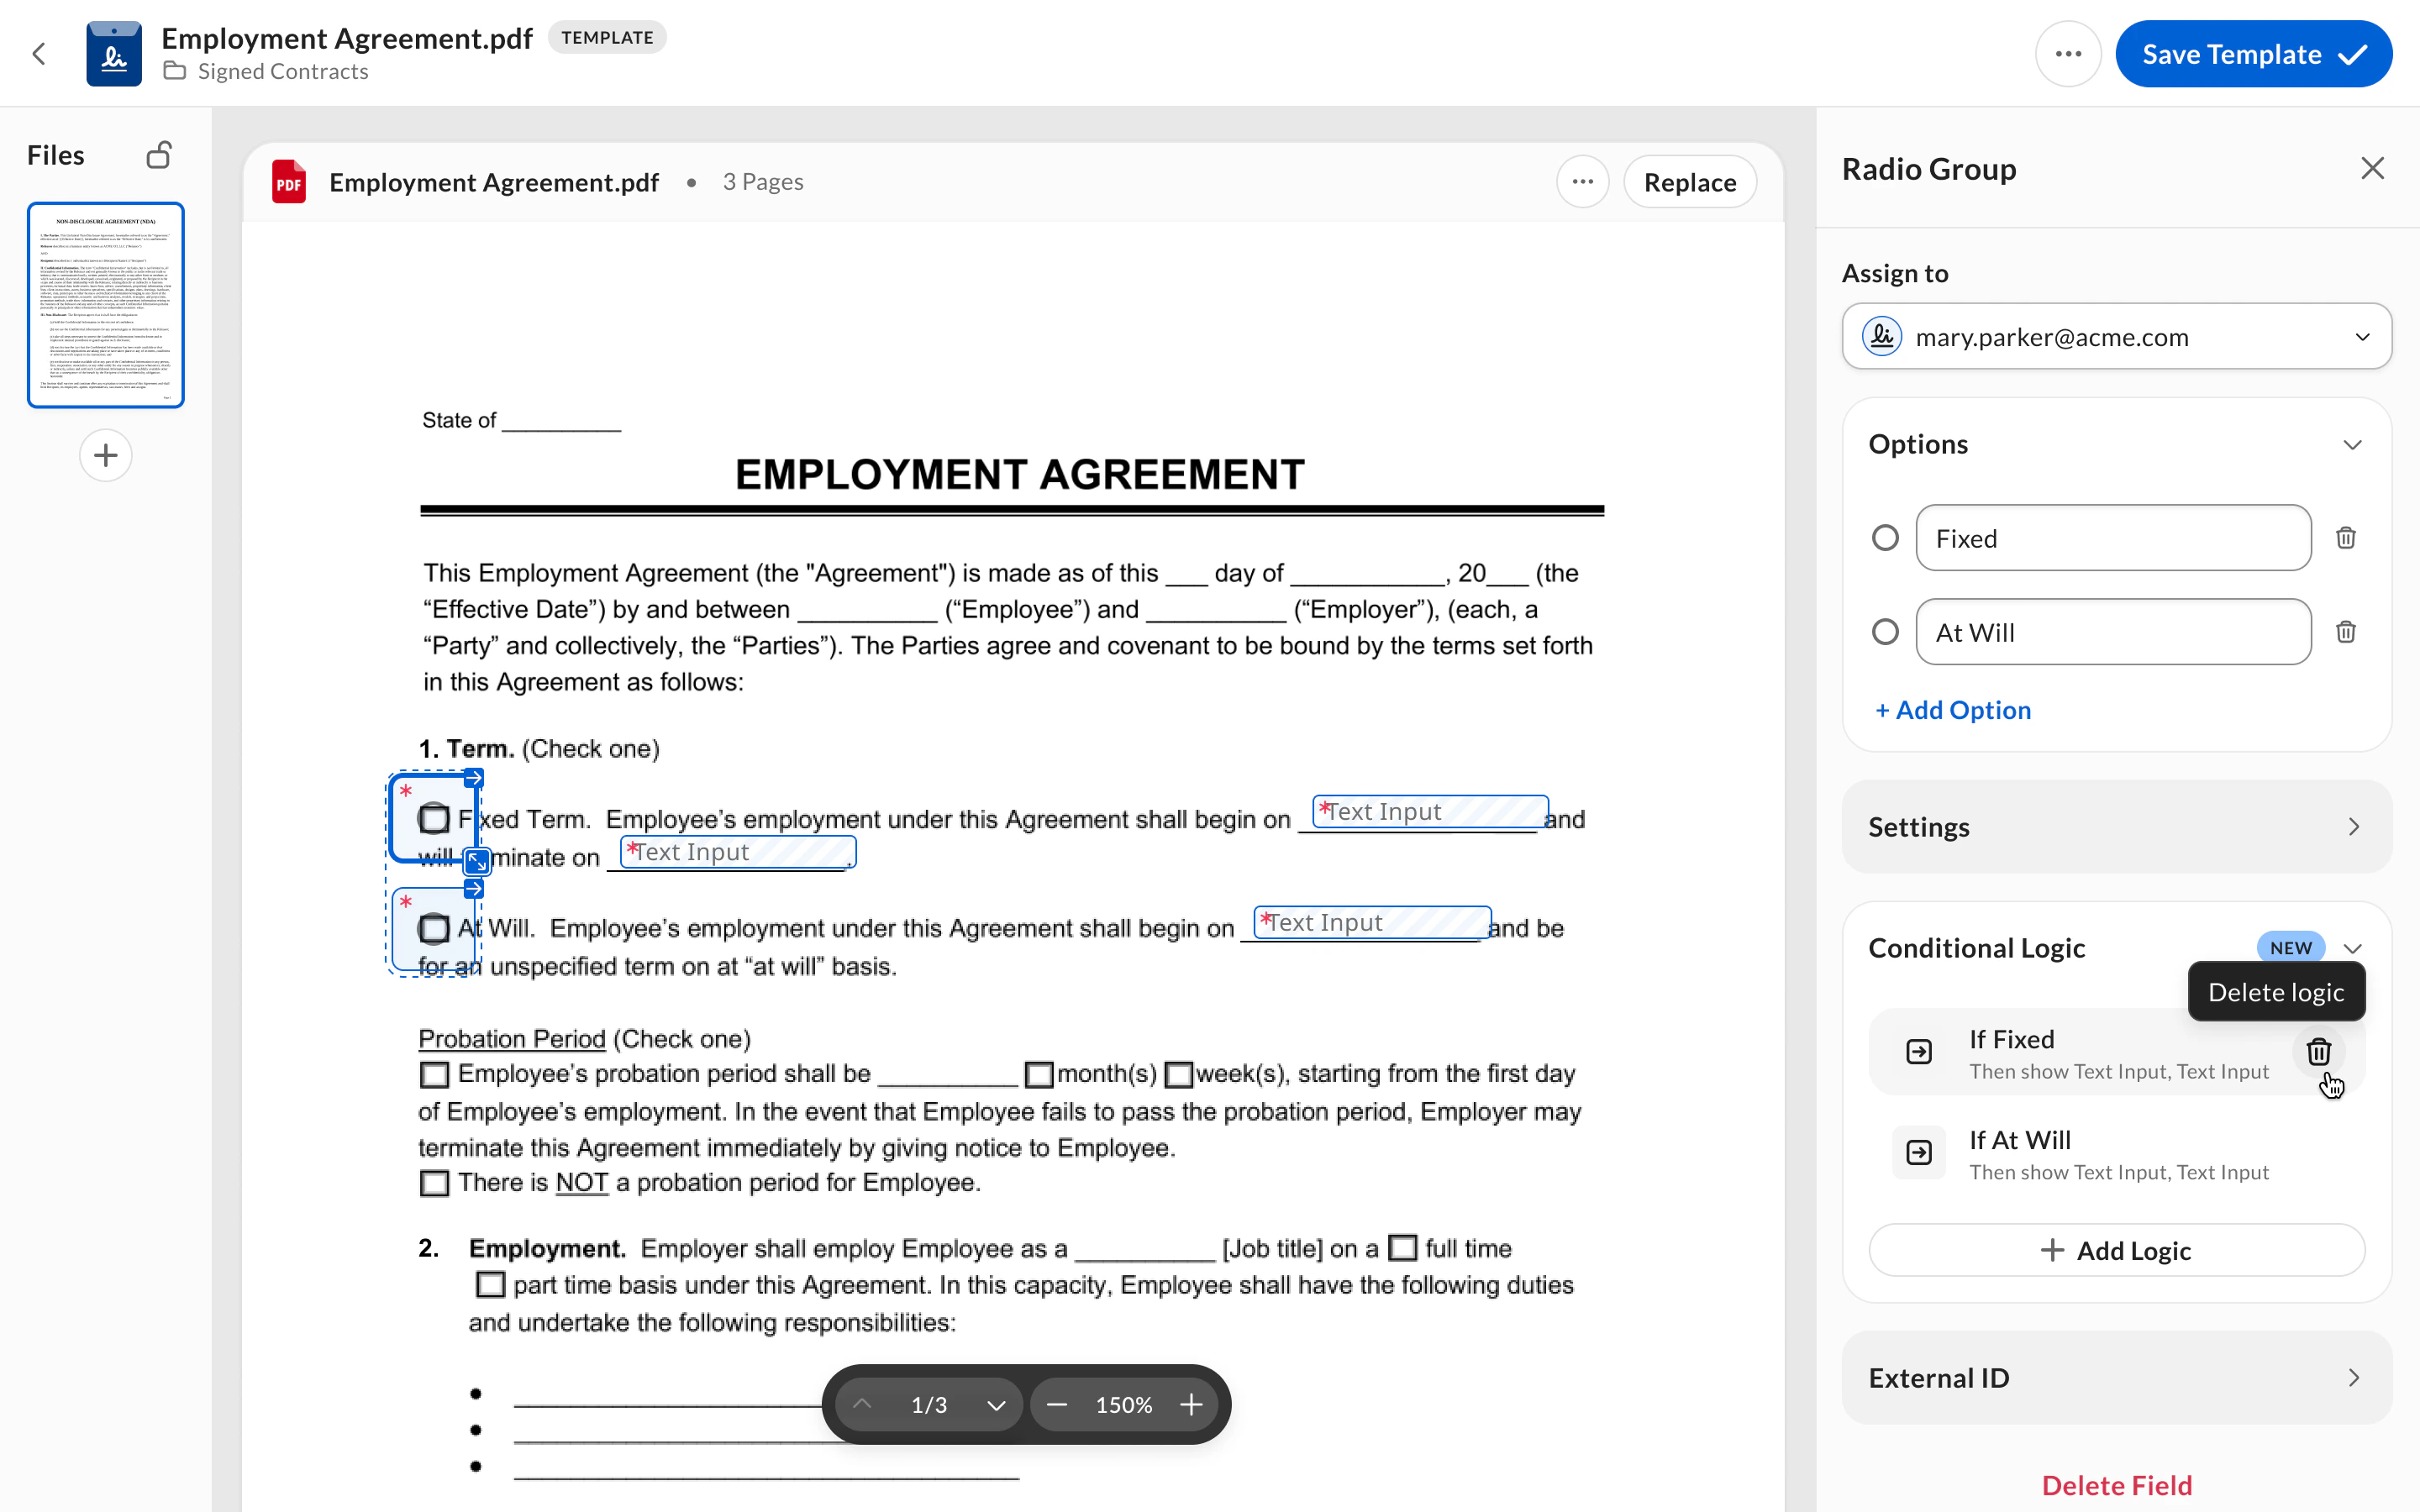
You can edit or delete conditional logic settings by following these steps:
* Edit a conditional logic setting: Locate the field with a conditional logic applied (striped background or an arrow), click on the **Trigger** or **Outcome** field, navigate to the **Conditional Logic** section, and click on the conditional logic setting you wish to edit.
* Delete a logic setting: Click the **Delete** icon next to the conditional logic to delete it.
## Managing Conditional Logic
You can edit or delete conditional logic settings by following these steps:
* Edit a conditional logic setting: Locate the field with a conditional logic applied (striped background or an arrow), click on the **Trigger** or **Outcome** field, navigate to the **Conditional Logic** section, and click on the conditional logic setting you wish to edit.
* Delete a logic setting: Click the **Delete** icon next to the conditional logic to delete it.
 ## Signer Experience
For signers, conditional fields stay hidden until the specified conditions are met. When a recipient selects an option from a dropdown, radio button, or checkbox with conditional logic, the relevant fields appear for them to fill out, sign, or complete.
## Best Practices and Notes
* Two different conditional logics can have the same outcome fields. For example:
* The first conditional logic for the checkbox\_1 reveals 2 fields
* The second conditional logic for the checkbox\_2 reveals the same 2 fields plus the third field
* The fields appear when at least one rule is true.
* To set up two fields (Field\_1 and Field\_2) where only one is visible at a time, depending on whether a checkbox (Checkbox\_1) is checked or not:
* Have two overlapping fields: Field\_1 and Field\_2 occupy the same space in the form.
* Set optional vs. required fields:
* Field\_1 is optional (the signer doesn’t have to fill it out).
* Field\_2 is required (the signer must fill it out).
* Set Checkbox as a trigger: Checkbox\_1 controls which field shows up.
* If Checkbox\_1 is **not checked**, then Field\_1 appears and can be filled optionally.
* If Checkbox\_1 **is checked**, then Field\_2 appears instead, and filling it becomes mandatory.
* By default, before any action by the signer:
* The optional Field\_1 is visible.
* Once the signer checks Checkbox\_1, Field\_2 replaces Field\_1 and becomes required.
* One trigger field can reveal another trigger field.
* We recommend leveraging conditional fields within reusable templates to mitigate the need to configure conditional logic settings for business processes that are repeatable amongst users and team members. You can learn more about reusable templates in Box Sign [here](/en/box-sign/templates/creating-using-and-sharing-templates).
## Known Limitations
* Conditional logic trigger and outcome fields must belong to the same signer.
* Unassigned fields cannot be configured with conditional logic.
* Deleting or reassigning any fields that have been configured with conditional logic results in the removal of the entire conditional logic configuration.
* Keyboard shortcuts do not support conditional logic.
* Text fields cannot currently be used as triggers.
* Currently, conditional Fields are disabled for CFR Part 11 flows and requests.
* If an admin applied field restrictions, users can only use available field types as trigger or outcome fields in conditional logic. For details on field restrictions, see [Enabling Sender Controls](/en/box-sign/box-sign-for-admins/enabling-sending-settings).
## Signer Experience
For signers, conditional fields stay hidden until the specified conditions are met. When a recipient selects an option from a dropdown, radio button, or checkbox with conditional logic, the relevant fields appear for them to fill out, sign, or complete.
## Best Practices and Notes
* Two different conditional logics can have the same outcome fields. For example:
* The first conditional logic for the checkbox\_1 reveals 2 fields
* The second conditional logic for the checkbox\_2 reveals the same 2 fields plus the third field
* The fields appear when at least one rule is true.
* To set up two fields (Field\_1 and Field\_2) where only one is visible at a time, depending on whether a checkbox (Checkbox\_1) is checked or not:
* Have two overlapping fields: Field\_1 and Field\_2 occupy the same space in the form.
* Set optional vs. required fields:
* Field\_1 is optional (the signer doesn’t have to fill it out).
* Field\_2 is required (the signer must fill it out).
* Set Checkbox as a trigger: Checkbox\_1 controls which field shows up.
* If Checkbox\_1 is **not checked**, then Field\_1 appears and can be filled optionally.
* If Checkbox\_1 **is checked**, then Field\_2 appears instead, and filling it becomes mandatory.
* By default, before any action by the signer:
* The optional Field\_1 is visible.
* Once the signer checks Checkbox\_1, Field\_2 replaces Field\_1 and becomes required.
* One trigger field can reveal another trigger field.
* We recommend leveraging conditional fields within reusable templates to mitigate the need to configure conditional logic settings for business processes that are repeatable amongst users and team members. You can learn more about reusable templates in Box Sign [here](/en/box-sign/templates/creating-using-and-sharing-templates).
## Known Limitations
* Conditional logic trigger and outcome fields must belong to the same signer.
* Unassigned fields cannot be configured with conditional logic.
* Deleting or reassigning any fields that have been configured with conditional logic results in the removal of the entire conditional logic configuration.
* Keyboard shortcuts do not support conditional logic.
* Text fields cannot currently be used as triggers.
* Currently, conditional Fields are disabled for CFR Part 11 flows and requests.
* If an admin applied field restrictions, users can only use available field types as trigger or outcome fields in conditional logic. For details on field restrictions, see [Enabling Sender Controls](/en/box-sign/box-sign-for-admins/enabling-sending-settings).