> ## Documentation Index
> Fetch the complete documentation index at: https://docs.box.com/llms.txt
> Use this file to discover all available pages before exploring further.
# Generating Documents with Box Doc Gen and Box Relay
If your organization is on the Enterprise Advanced plan, you have access to Box Doc Gen and Box Forms within Box Relay, enabling you to:
* Seamlessly collect data with web and mobile-friendly forms.
* Dynamically generate custom documents based on data submitted via:
* Box Forms,
* workflow variables in Relay,
* metadata, and
* manual data entry.
* Automatically send documents, generated by Box Doc Gen, for e-signature and approval with Box Sign in Relay.
## Overview
Here's a summary of how to create an end-to-end document generation workflow in Box Relay:
1. Create a Doc Gen template within Microsoft Word using the [Box Doc Gen Template Creator add-in](https://appsource.microsoft.com/en-us/product/office/wa200007137?tab=overview). You can create the template using [JSON data](/en/box-doc-gen/box-doc-gen-templates/creating-a-template-from-json) or [manually](/en/box-doc-gen/box-doc-gen-templates/creating-a-template-manually).
2. Upload the Doc Gen template within the Box Doc Gen entry point in Box Relay. Alternatively, upload the template within a preferred folder by right-clicking the template and selecting **Mark as Doc Gen Template**.
3. Create a new Box Relay workflow and set the trigger to be a Box Forms submission.
4. Configure a Generate Document workflow outcome; select the Doc Gen template you want to use; configure the workflow variable mappings; save the location folder in which you want to save the generated document; and name the generated document.
5. Create an approval or review task.
6. Create a Request Signature outcome; configure the file that you want to send for signature, the recipient mappings, recipient roles, and specify the signing order. You can also select a metadata template to track the signature request status in real time.
## Creating the Relay Workflow
Follow these steps to create and configure the Relay workflow.
### Step 1: Create your Doc Gen template
To create your Doc Gen template, you must use the [Box Doc Gen Template Creator add-in](https://appsource.microsoft.com/en-us/product/office/wa200007137?tab=overview) in Microsoft. Learn about installing the template creator [here](/en/box-doc-gen/box-doc-gen-installation/installing-the-box-doc-gen-template-creator-add-in-for-microsoft-word).
To create your Docs Gen template, do one of the following:
* [Use sample JSON data and the Box Doc Gen Template Creator add-in](/en/box-doc-gen/box-doc-gen-templates/creating-a-template-from-json), or
* [Create a Doc Gen template manually with the Box Doc Gen Template Creator add-in](/en/box-doc-gen/box-doc-gen-templates/creating-a-template-manually).
### Step 2: Upload the Doc Gen template to Box
**To upload an authored Doc Gen template to Box:**
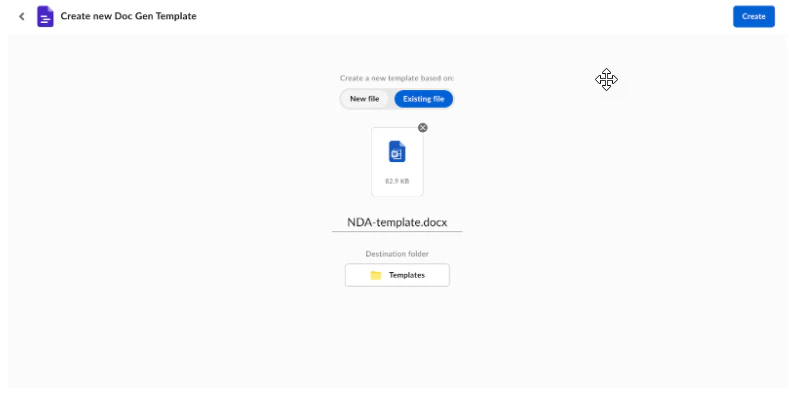
1. In Box, to use an existing file, navigate to **Relay > Doc Gen Templates > New Doc Gen Template > Existing file**. To create a new file, select: **New > Doc Gen Template > New file > provide a name for the template > Destination folder > Create**. Box creates a new Doc Gen template and Word file that you can modify using Microsoft Word in Box.
2. Select your Doc Gen template.
3. Select the destination folder in Box.
4. Click **Create**. Box uploads the template to Box and marks it as a Doc Gen template.
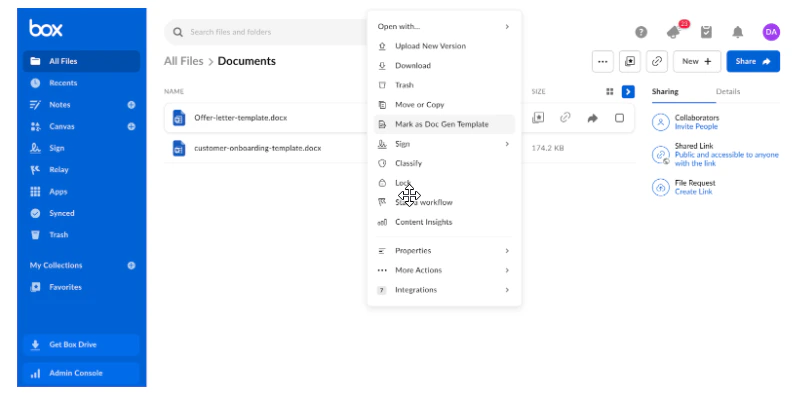
 **If the template already exists in Box:**
1. Click the docx file.
2. Click the ellipsis (**…**) then select **Mark as Doc Gen template**.
**If the template already exists in Box:**
1. Click the docx file.
2. Click the ellipsis (**…**) then select **Mark as Doc Gen template**.
 ### Step 3: Create a workflow that starts from a Form submission
**To configure a workflow initiated by a Form submission:**
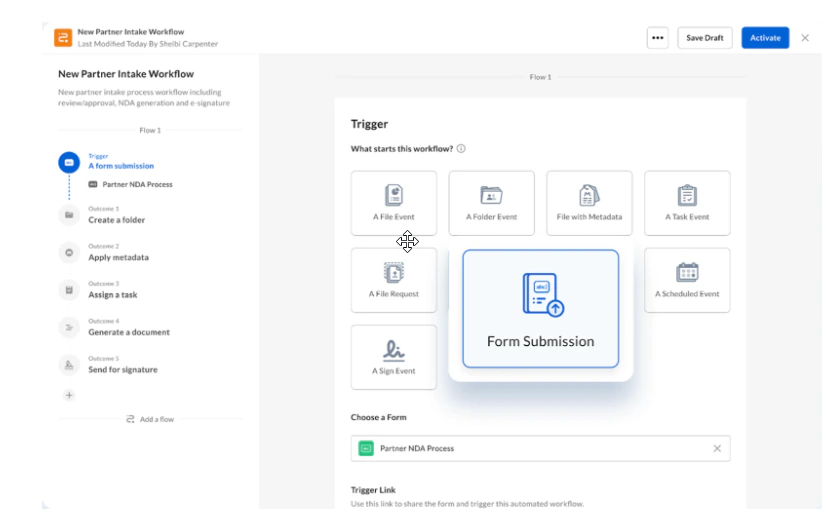
1. In Box, navigate to **Relay > New Workflow**.
2. In the **Trigger** section, under **What starts the workflow**, click **Form Submission**.
3. Select the Box Form that initiates the workflow.
### Step 3: Create a workflow that starts from a Form submission
**To configure a workflow initiated by a Form submission:**
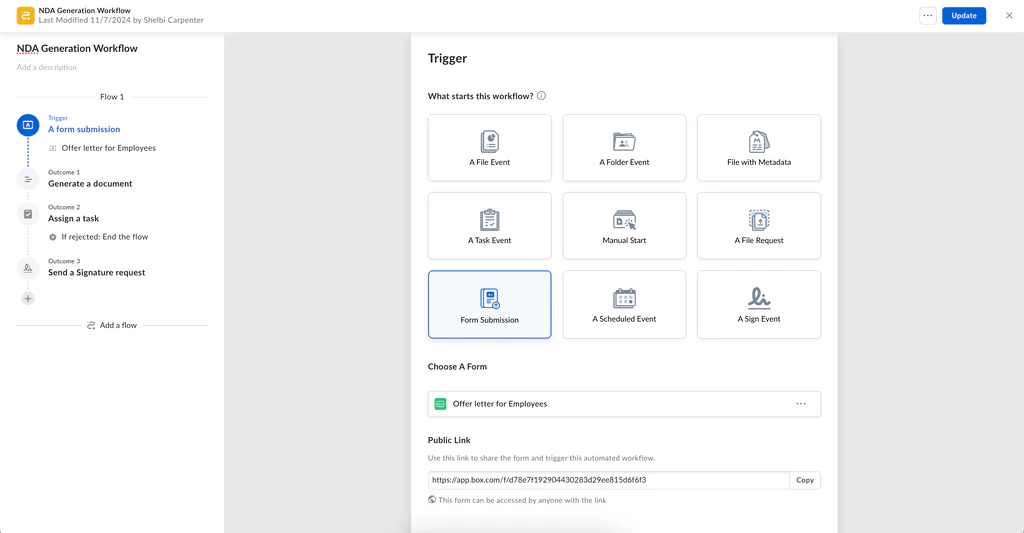
1. In Box, navigate to **Relay > New Workflow**.
2. In the **Trigger** section, under **What starts the workflow**, click **Form Submission**.
3. Select the Box Form that initiates the workflow.
 ### Step 4: Set up Document Generation as an Outcome in Relay
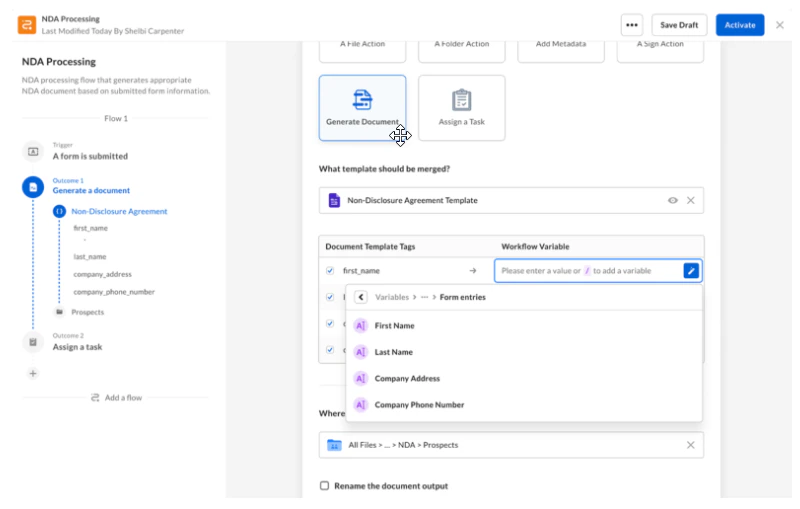
To use the form responses to dynamically create documents, select **Generate Document** as your first outcome.
Relay searches for all dynamic fields associated with your Doc Gen template, and enables you to map those fields from the Box Form submission to workflow variables and Doc Gen tags in your Doc Gen template. When a Box Forms submission initiates the Box Relay workflow, Relay uses the configured template mapping between the Doc Gen template tags and the Box Form submission data to identify what content to add from the Box Form into the generated document.
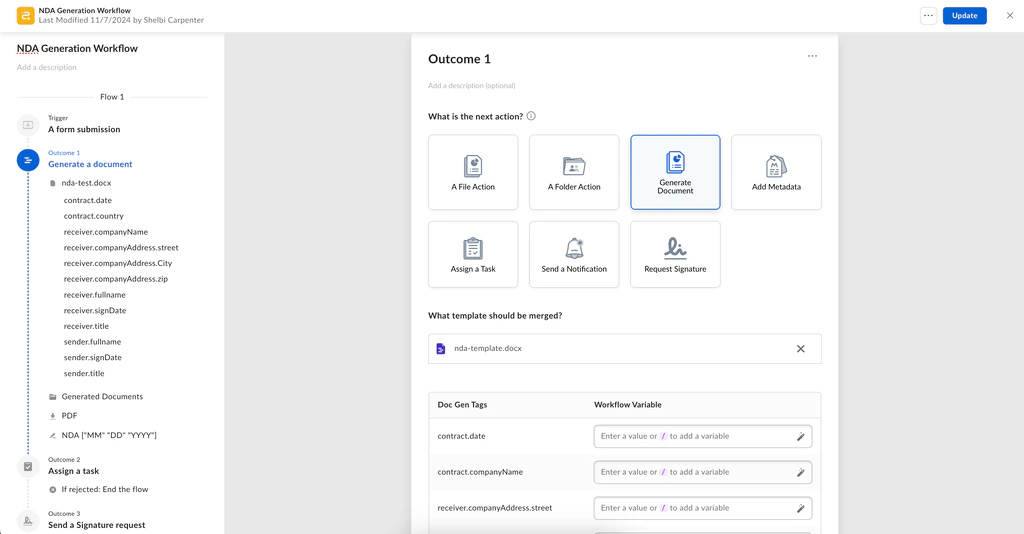
**To configure Document Generation as an Outcome to the workflow:**
1. Under **Outcome**, click **Generate document**.
2. Choose a Doc Gen template to configure.
3. Map the fields from the selected Form to the variables in the Doc Gen template.
4. Select the destination folder where Relay will save the generated documents.
### Step 4: Set up Document Generation as an Outcome in Relay
To use the form responses to dynamically create documents, select **Generate Document** as your first outcome.
Relay searches for all dynamic fields associated with your Doc Gen template, and enables you to map those fields from the Box Form submission to workflow variables and Doc Gen tags in your Doc Gen template. When a Box Forms submission initiates the Box Relay workflow, Relay uses the configured template mapping between the Doc Gen template tags and the Box Form submission data to identify what content to add from the Box Form into the generated document.
**To configure Document Generation as an Outcome to the workflow:**
1. Under **Outcome**, click **Generate document**.
2. Choose a Doc Gen template to configure.
3. Map the fields from the selected Form to the variables in the Doc Gen template.
4. Select the destination folder where Relay will save the generated documents.
 The document you generate through a Relay outcome becomes available in all subsequent:
* File outcomes,
* Metadata outcomes,
* Task assignment outcomes, and
* Signature request outcomes, which enable you to send the generated documents automatically for signature with [Box Sign](/en/box-sign/box-sign-for-admins/introducing-box-sign).
* Signature request file and signing log become available after initial outcome.
### Step 5: Create a Review Task
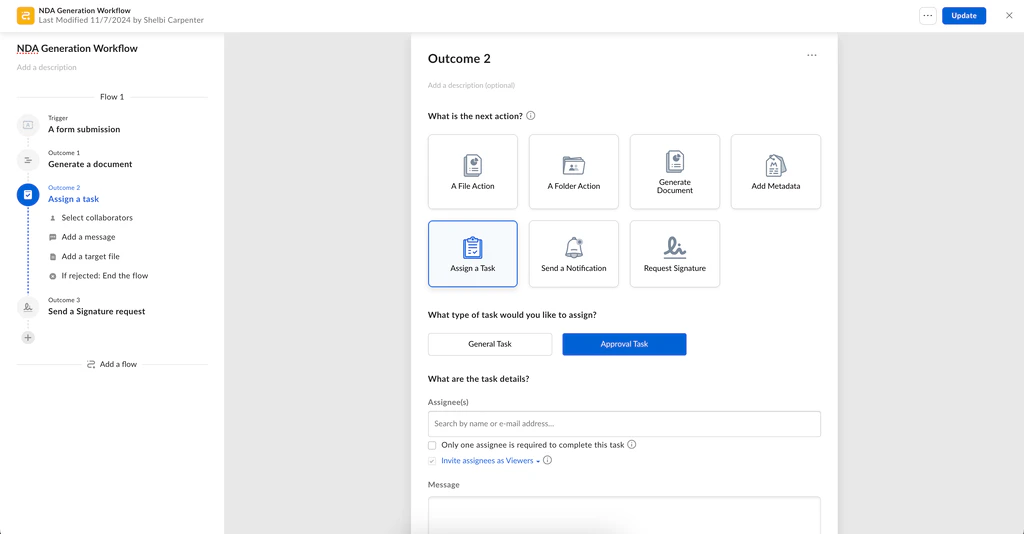
Box recommends customers manually review the automatically generated document before using it in a subsequent business process. To do this, use the **Assign a Task** outcome.
After configuring the Form Submission trigger and Generate Document outcome, create an additional Assign a Task outcome.
**To assign a Task in Relay:**
1. Click **+ Outcome** then select **Assign a Task**.
2. Follow the steps from [Task outcome options](/en/box-relay/building-basic-workflows/understanding-triggers-and-outcomes-in-relay#task-outcome-options).
3. Within **Assign the task to a file**, select the file generated from Outcome 1.
The document you generate through a Relay outcome becomes available in all subsequent:
* File outcomes,
* Metadata outcomes,
* Task assignment outcomes, and
* Signature request outcomes, which enable you to send the generated documents automatically for signature with [Box Sign](/en/box-sign/box-sign-for-admins/introducing-box-sign).
* Signature request file and signing log become available after initial outcome.
### Step 5: Create a Review Task
Box recommends customers manually review the automatically generated document before using it in a subsequent business process. To do this, use the **Assign a Task** outcome.
After configuring the Form Submission trigger and Generate Document outcome, create an additional Assign a Task outcome.
**To assign a Task in Relay:**
1. Click **+ Outcome** then select **Assign a Task**.
2. Follow the steps from [Task outcome options](/en/box-relay/building-basic-workflows/understanding-triggers-and-outcomes-in-relay#task-outcome-options).
3. Within **Assign the task to a file**, select the file generated from Outcome 1.
Step 6: Automatically send the generated document for signature with Box Sign
Box Relay enables you send generated document for e-signature or approval with the Box Sign outcome.
**Important**:\
To use the Request Signature outcome in Relay, you must create and input Box Sign template tags within the Doc Gen template in Microsoft Word, using the [Box Doc Gen Template Creator add-in](https://appsource.microsoft.com/en-us/product/office/wa200007137?tab=overview).
**To send the generated document for e-signature or approval with Box Sign:**
1. Select the **Request Signature** outcome.
2. Select the file generated by Outcome 1.
3. Under **Add Recipients**, add signers and approvers by either using dynamic variables or by manually inputting an email address. For example, if you added an email address field within your Box Form, you can dynamically leverage the email address entered within that field to send the generated document for signature or approval.
4. For each recipient, specify one of the following Box Sign recipient roles: **Signer**, **Approver**, or **Get a copy**. To learn more about Box Sign recipient roles see [this article](/en/box-sign/sending-a-document-for-signature/roles-for-signers).
5. For multiple recipients, specify the signing order by enabling **Specify Signing Order**, and adding a number next to each signer's name that corresponds to the desired signing order.
**Important:** Ensure you do not use the same email twice (for example, by using a dynamic variable and an email input) because doing so causes the workflow to fail.
6. Update metadata on the signed files to include real-time signature request status during the signature request process. To do this:
1. Click **Select a metadata template for tracking signature requests (optional)**.
2. Specify the metadata template and the metadata attribute that Relay will populate with signature request status. Signature request status values include: **In progress**, **Signed**, **Cancelled**, and **Expired**.
7. Click **Activate**.
## Your Workflow in Action
After you activate your Relay workflow, when someone submits a Box Form your workflow automatically:
* Generates the document using the Doc Gen template.
* Auto-populates and formats the document with the relevant content from the submitted Box Form and the data you configured in the Doc Gen outcome in Creating the Relay Workflow, Step 4.
* Saves the document in the folder you defined in Creating the Relay Workflow, Step 2.
* If you configured the Request Signature outcome, Box automatically sends the generated document for signature or approval to the recipients you defined in Creating the Relay Workflow, Step 6.
* For the workflow to continue, the recipient(s) will need to complete the signature requests. Otherwise, if the recipient(s) cancels, declines, or leaves the request to expire, then the workflow ends.