> ## Documentation Index
> Fetch the complete documentation index at: https://docs.box.com/llms.txt
> Use this file to discover all available pages before exploring further.
# Creating and Using Your own Custom Workflow Templates
Box offers pre-built templates to help your workflow creators more quickly automate and streamline business processes based around content. [More on pre-built templates](/en/box-relay/building-basic-workflows/using-templates-to-build-workflows-quickly). However, you can also build your own templates, which you can use to tailor and standardize how a workflow is implemented across your enterprise, and then share those templates with others. In this way, you can:
* Expand and accelerate Relay adoption across your organization.
* Avoid inconsistencies that can result from building numerous similar “one-off” workflows.
* Standardize workflow best practices across multiple departments.
* Get more value, in less time, from your Relay implementation.
### Creating Custom Workflow Templates
Customizable workflow templates enable departments or divisions across an organization to use the same basic template. People can access the templates you create, make any modifications they wish, and then activate the templated workflows.
Relay enables you to:
* Create a new workflow template from scratch
* Create a template from an existing workflow
* Create a new template from an existing template
In all cases, templates you create and save display on your **Workflows** page, under **My Templates**. Templates you publish – that is, templates you make available for others to use – display on your **Workflows** page, under **My Company**.
**To create a new template from scratch:**
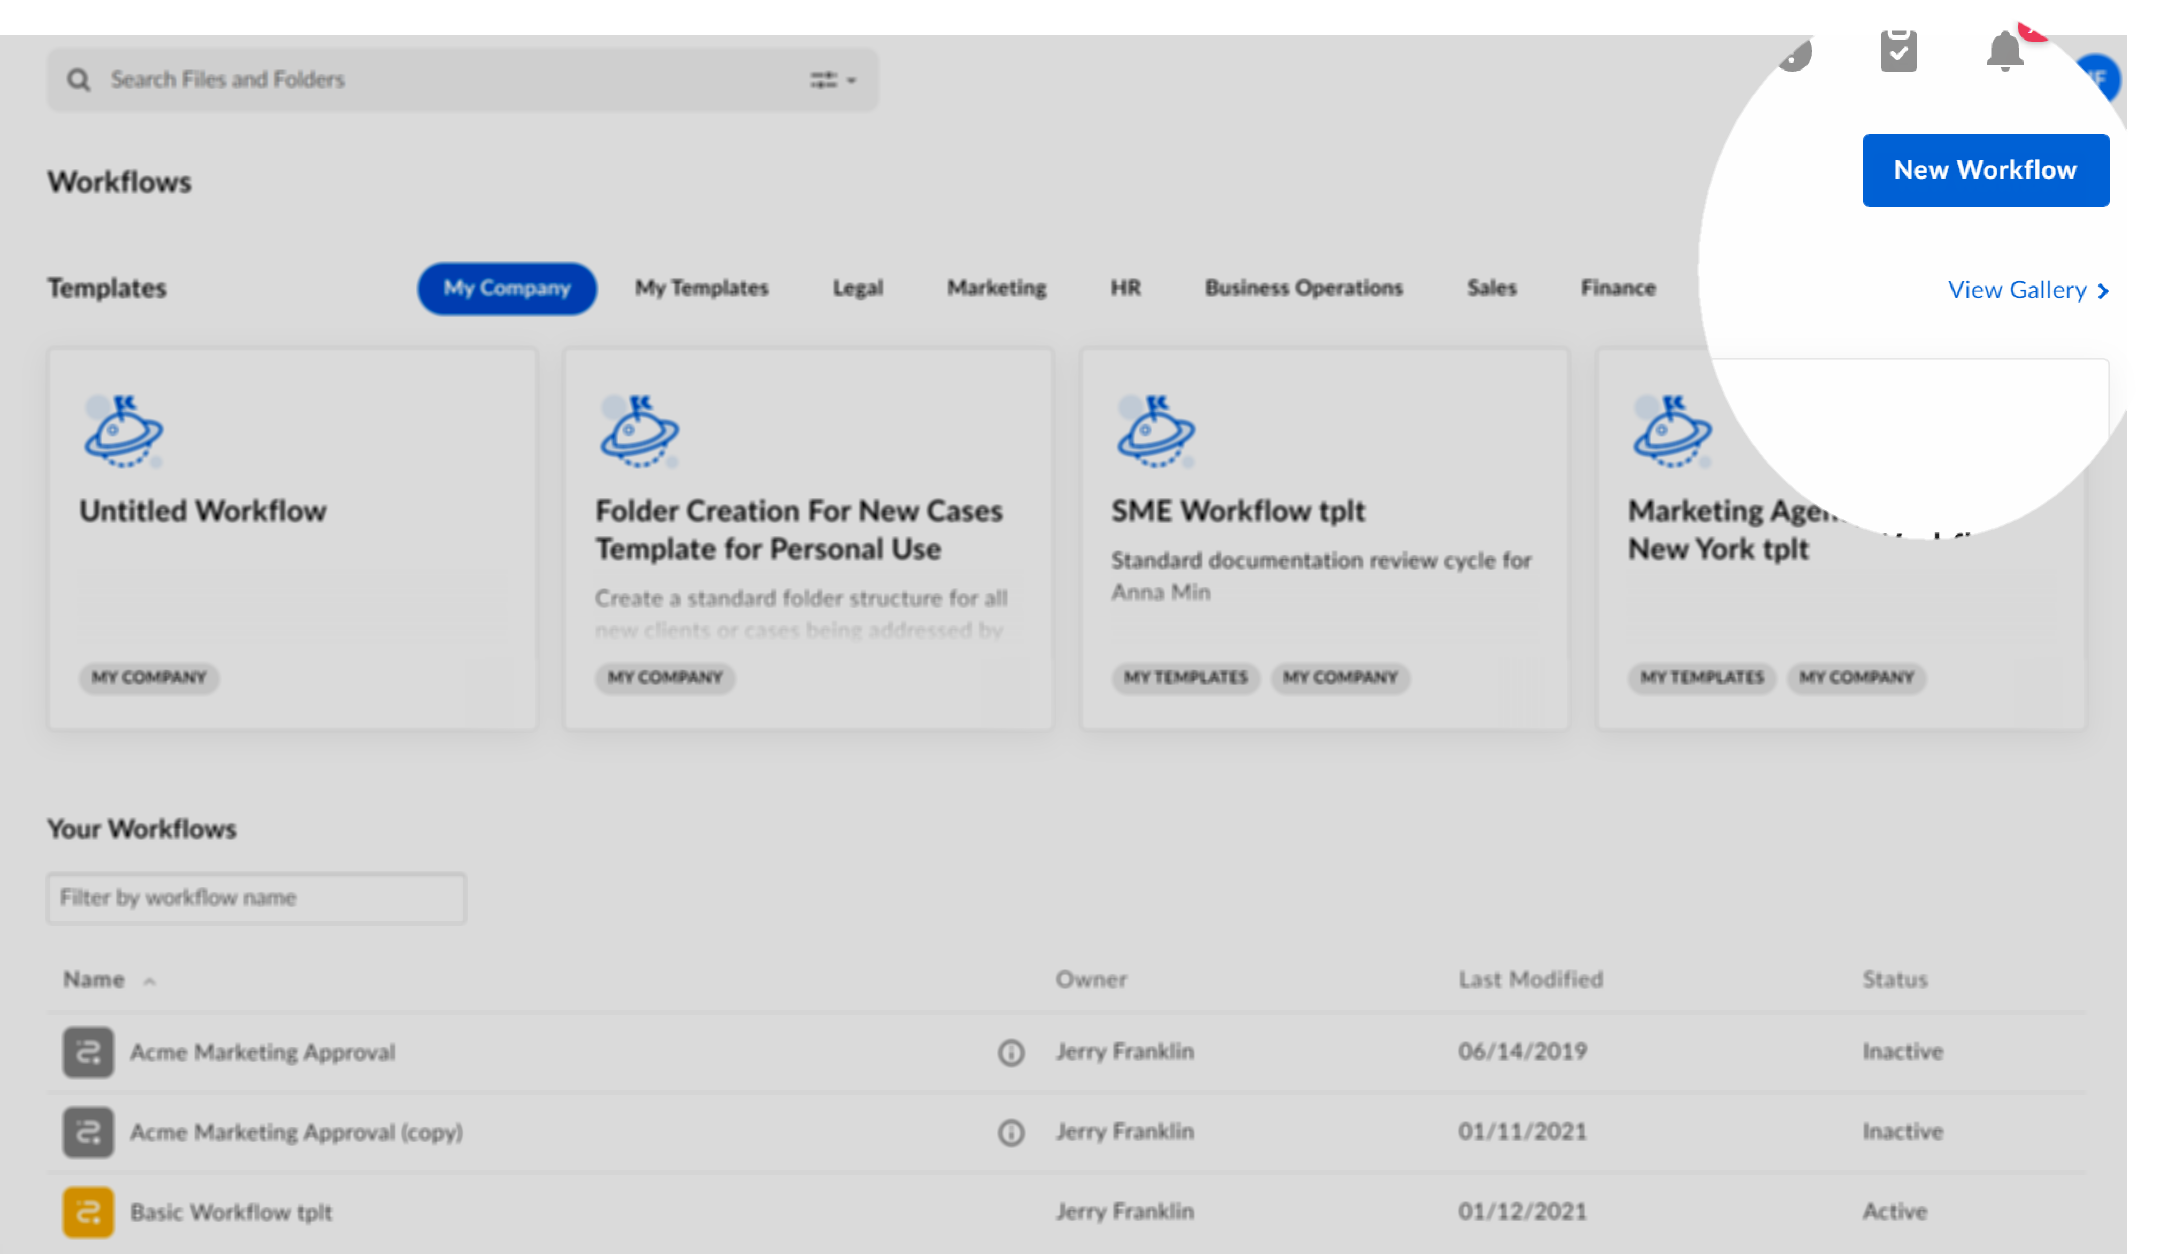
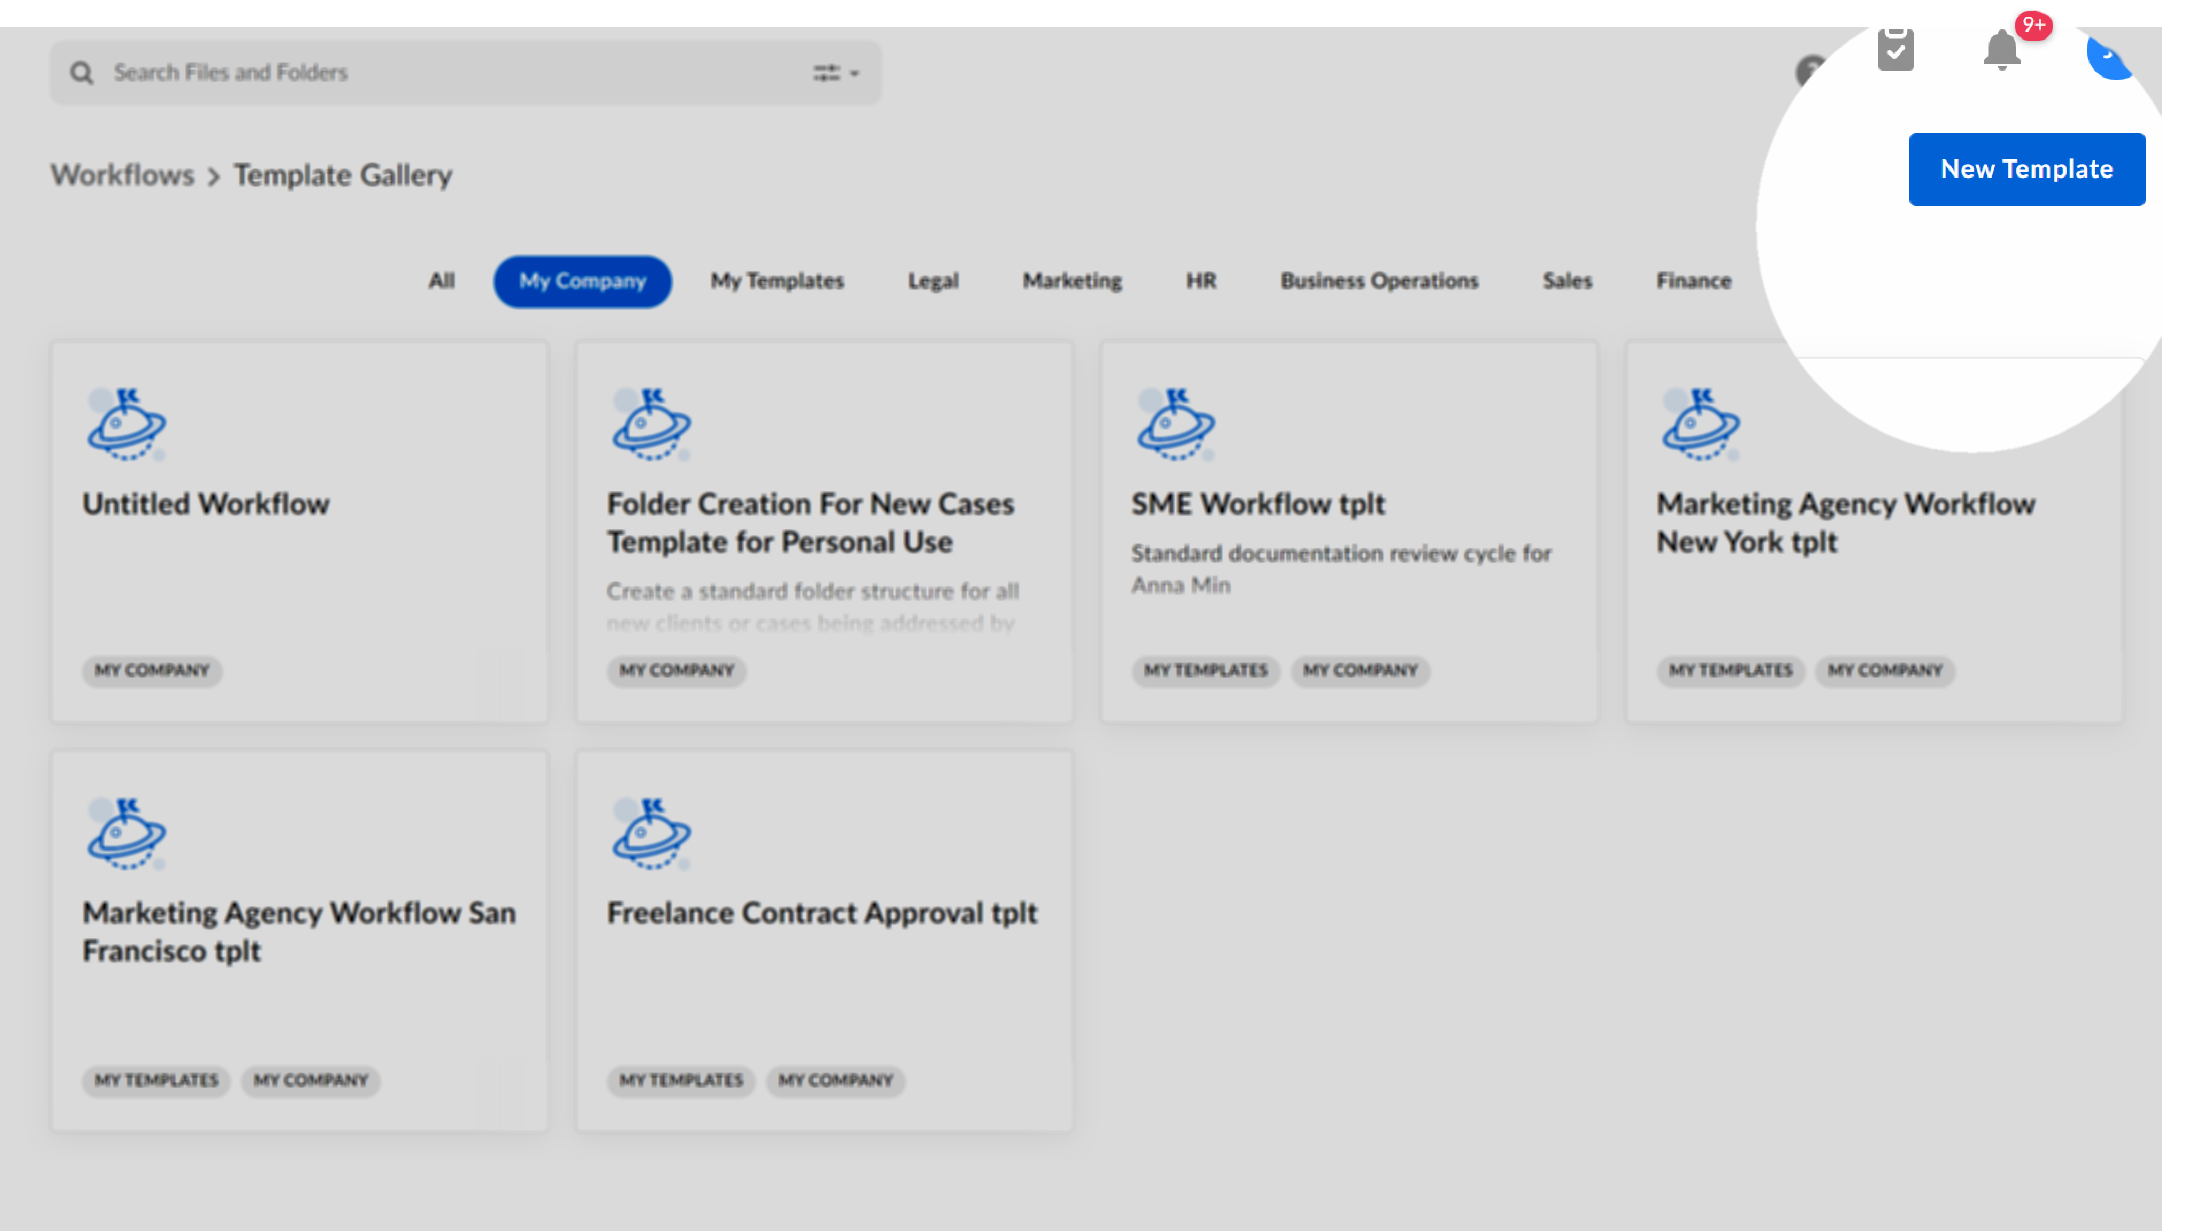
1. Toward the top right, click **New Template**.
* If Box is displaying a **New Workflow** button and not a **New Template** button, click the **View Gallery** link immediately below the button. All workflow templates now display, and the button label changes to **New Template**.
 2. Build the workflow. This is the same process as building any workflow, with one important exception: you can assign trigger and outcome details to be completed later, by whoever uses the template, instead of specifying these details yourself. To do this, click **To be completed…** at the relevant prompts. These details display with a purple icon.
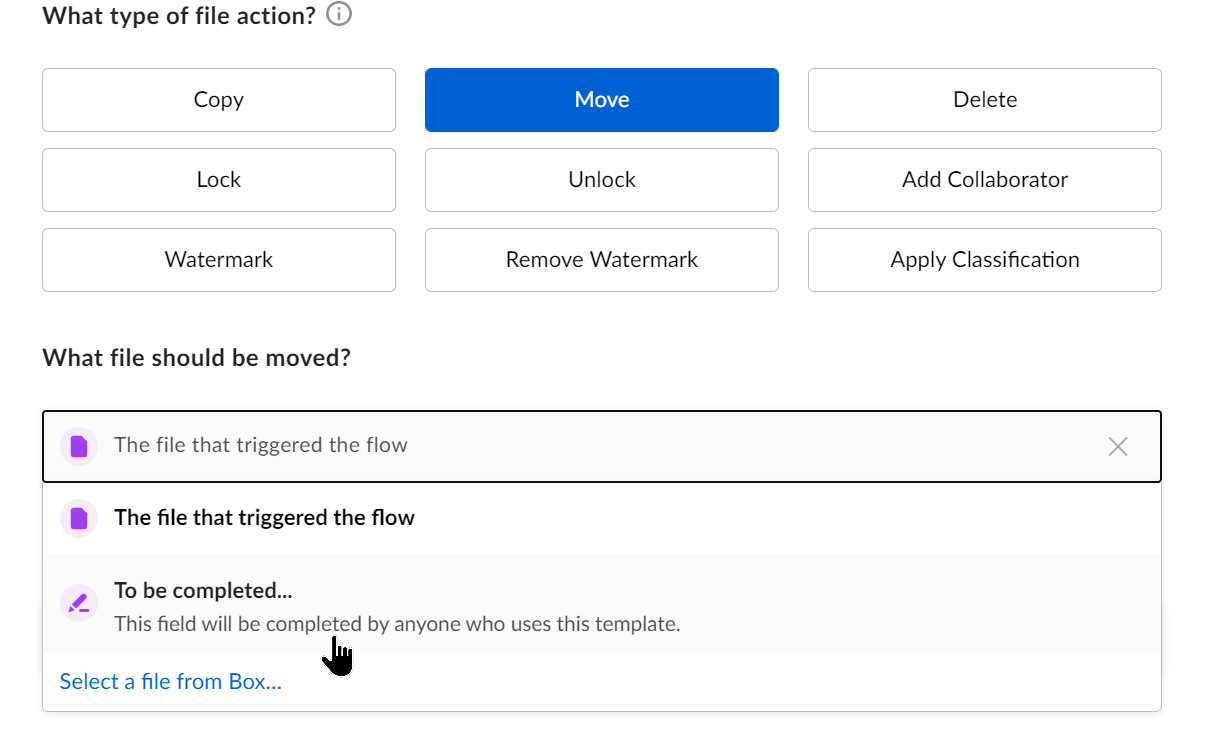 When you're done, click **Save**.
Each template displays in the template gallery with labels that indicate the template's origin:
* one of the six pre-built categories that Box provides (HR, Business Operations, Sales, and so on)
* if applicable, **My Templates** and/or **My Company**
**To create a template from an existing workflow**
1. From your **Workflows** page, to the right of the workflow you want, click the ellipsis (**…**).
2. From the menu that displays, click **Edit**. The workflow opens in the workflow builder.
3. In the top right of the screen, click the ellipsis.
4. From the menu that displays, click **Use as a template**.
* If you do not need to share this workflow with anyone else, click **Save**. This template now displays in your **Workflows** page, under **My Templates**.
* To share this workflow for others to use, click **Publish**. Then, at the prompt, click **Confirm**. This template now displays in the **Workflows** page, under **My Company**, for everyone who uses Relay in your organization.
**To create a new template from an existing template:**
1. From your **Workflows** page, click **My Templates**.
2. Click the template you wish to modify. The workflow builder page opens.
3. Edit the workflow as you wish.
* If you do not need to share this workflow with anyone else, click **Save**. This template now displays in your **Workflows** page, under **My Templates**.
* To share this workflow for others to use, click **Publish**. Then, at the prompt, click **Confirm**. This template now displays in the **Workflows** page, under My Company, for everyone who uses Relay in your organization.
You can also easily modify an existing template. To do this, unpublish the template you wish to modify. Then make any changes you wish, and re-publish.
**Tip**
It’s good practice to indicate in your workflow name whether the workflow is a template – for example, **Agency Review Tmplt**. Workflow names do not indicate by default whether they are templates or simply personal or single-use workflows.
**Note**
If you are unable to share your own templates with the rest of your organization, contact your Box Administrator. The administrator controls who can publish custom templates to the rest of the company.
### Using a custom template
Putting a custom template to use -- that is, activating the workflow that you (or someone else) has built and customized -- is straightforward.
**To use a custom template:**
1. In your **Template Gallery**, locate and click the workflow you want. A window opens, displaying the steps configured in the template.
2. Click **Use Template**. The Workflow Builder opens.
3. Review all of the workflow steps. Modify the workflow if you wish, and be sure also to complete any details that you, as the workflow starter, are required to specify (selecting folders, identifying notification recipients, and so on).
4. When you're done, click **Activate**.
The workflow is now ready to work and displays in your list of active workflows.
### Removing and Deleting Templates
If you wish to remove a template from the list of templates available to everyone else in your company, you can unpublish it. One reason you may wish to do this: you need to modify an existing template. To modify a template, you must unpublish the template, first. Then change it as you wish, and re-publish it.
You can unpublish only templates you have created. Box Admins and Co-admins can unpublish anyone's customized template.
**To unpublish a template from the list:**
1. Click the workflow template you wish to remove. The workflow overview window opens.
2. Click **Edit**. The **Workflow builder** page opens.
3. In the top-right corner, click the ellipsis (**...**).
4. Click **Unpublish**.
The template no longer displays in the list of templates under **My Company**. However, it continues to display in the list under **My Templates**. To remove it entirely, you can delete it.
**To delete a template:**
1. Click the workflow template you wish to remove. The workflow overview window opens.
2. Click **Edit**. The **Workflow builder** page opens.
3. In the top-right corner, click the ellipsis.
4. Click **Delete**.
When you're done, click **Save**.
Each template displays in the template gallery with labels that indicate the template's origin:
* one of the six pre-built categories that Box provides (HR, Business Operations, Sales, and so on)
* if applicable, **My Templates** and/or **My Company**
**To create a template from an existing workflow**
1. From your **Workflows** page, to the right of the workflow you want, click the ellipsis (**…**).
2. From the menu that displays, click **Edit**. The workflow opens in the workflow builder.
3. In the top right of the screen, click the ellipsis.
4. From the menu that displays, click **Use as a template**.
* If you do not need to share this workflow with anyone else, click **Save**. This template now displays in your **Workflows** page, under **My Templates**.
* To share this workflow for others to use, click **Publish**. Then, at the prompt, click **Confirm**. This template now displays in the **Workflows** page, under **My Company**, for everyone who uses Relay in your organization.
**To create a new template from an existing template:**
1. From your **Workflows** page, click **My Templates**.
2. Click the template you wish to modify. The workflow builder page opens.
3. Edit the workflow as you wish.
* If you do not need to share this workflow with anyone else, click **Save**. This template now displays in your **Workflows** page, under **My Templates**.
* To share this workflow for others to use, click **Publish**. Then, at the prompt, click **Confirm**. This template now displays in the **Workflows** page, under My Company, for everyone who uses Relay in your organization.
You can also easily modify an existing template. To do this, unpublish the template you wish to modify. Then make any changes you wish, and re-publish.
**Tip**
It’s good practice to indicate in your workflow name whether the workflow is a template – for example, **Agency Review Tmplt**. Workflow names do not indicate by default whether they are templates or simply personal or single-use workflows.
**Note**
If you are unable to share your own templates with the rest of your organization, contact your Box Administrator. The administrator controls who can publish custom templates to the rest of the company.
### Using a custom template
Putting a custom template to use -- that is, activating the workflow that you (or someone else) has built and customized -- is straightforward.
**To use a custom template:**
1. In your **Template Gallery**, locate and click the workflow you want. A window opens, displaying the steps configured in the template.
2. Click **Use Template**. The Workflow Builder opens.
3. Review all of the workflow steps. Modify the workflow if you wish, and be sure also to complete any details that you, as the workflow starter, are required to specify (selecting folders, identifying notification recipients, and so on).
4. When you're done, click **Activate**.
The workflow is now ready to work and displays in your list of active workflows.
### Removing and Deleting Templates
If you wish to remove a template from the list of templates available to everyone else in your company, you can unpublish it. One reason you may wish to do this: you need to modify an existing template. To modify a template, you must unpublish the template, first. Then change it as you wish, and re-publish it.
You can unpublish only templates you have created. Box Admins and Co-admins can unpublish anyone's customized template.
**To unpublish a template from the list:**
1. Click the workflow template you wish to remove. The workflow overview window opens.
2. Click **Edit**. The **Workflow builder** page opens.
3. In the top-right corner, click the ellipsis (**...**).
4. Click **Unpublish**.
The template no longer displays in the list of templates under **My Company**. However, it continues to display in the list under **My Templates**. To remove it entirely, you can delete it.
**To delete a template:**
1. Click the workflow template you wish to remove. The workflow overview window opens.
2. Click **Edit**. The **Workflow builder** page opens.
3. In the top-right corner, click the ellipsis.
4. Click **Delete**.